Advanced camera techniques in Unity 3D
3D Game Design with Unity
🕑 This lesson will take about 15 minutes
In this lesson, you will learn how to add cameras to objects, how to set up a split-screen camera system, and how to add a picture-in-picture (PIP) effect to your game.
Adding cameras to objects is particularly useful for when you want to add a camera view to a character or game object eg. first-person view inside a car.
Split-screen camera system
Split-screen camera systems are great for multiplayer games because you can have one player using the top half of the screen and another player using the bottom half of the screen. You could set up two cameras or you could have four cameras taking up the screen if you have four players in the game. Take a look at the example below.
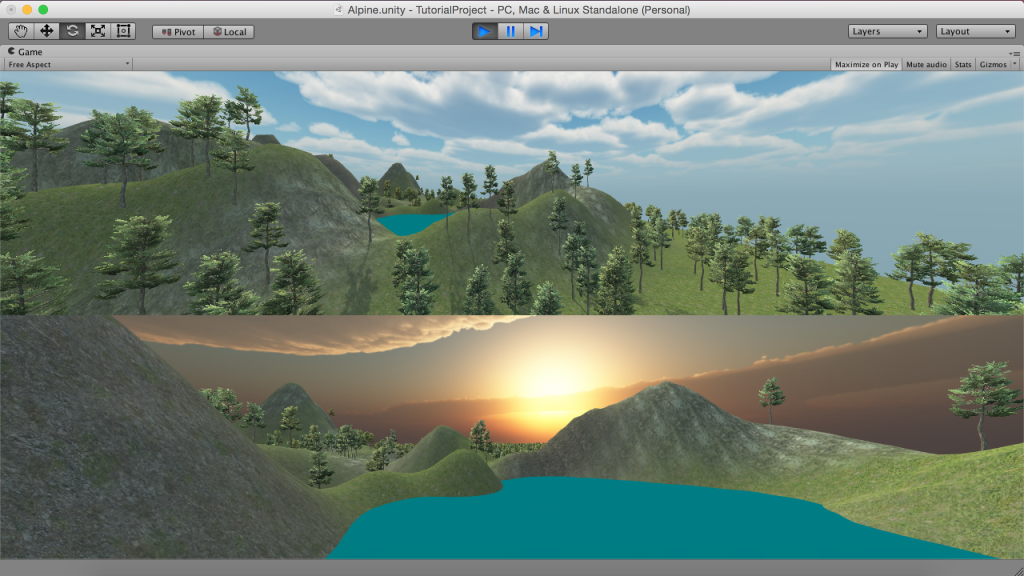
Two players using split screen camera system.
Picture-in-picture (PIP)
Picture-in-picture (PIP) effects are great for mini-maps and rear-camera views. For example, you could use a camera to display a map in the top corner of the screen so the player knows where they are located in the game’s world. You could also use a PIP effect to display a rear-view mirror so that a player can see behind their car in a racing game. Take a look at the example below.

A picture-in-picture (PIP) effect with a second camera view.
We will also look at how to handle errors that you might see related to multiple audio listeners. To learn how to add cameras to objects, add split screen camera systems and PIP effects, watch the video below.
Is YouTube blocked at school? Watch on Google Drive.
Next lesson: Adding a mini-map to a 3D game in Unity