Getting started with HTML & CSS
Web Design with HTML & CSS
🕑 This lesson will take about 15 minutes
HTML (HyperText Markup Language) is the markup language that is used to create web pages. It is written using HTML elements (also known as tags) that contain content such as text, lists, images, tables, videos, links and more. These tags are enclosed between the < and > characters. Tags often come in pairs such as <p> and </p> (the <p> tag is used to add a paragraph of text) but this is not always the case as some tags are unpaired, for example <br/> (which is used to create a new line).
Web browsers such as Google Chrome, Internet Explorer, Safari or Firefox are able to read HTML files and display them as web pages on your screen. The tags tell the web browser what to display in the browser and how to display it. HTML files end in the .html file extension and can be edited in any text editing program.
HTML is the basic building block of all web pages but most websites today don’t just use standalone HTML. Web pages can be supported by CSS (Cascading Style Sheets) code which defines the look and layout of text and other elements on multiple pages, and other scripts written in languages such as JavaScript which can control how a web page behaves.
Think of it like this:
HTML is the language used to add content to the page
CSS is the language used to change how that content appears
JavaScript is used to program logic and interactivity in web pages
This lesson is the first in the HTML and CSS course. These lessons will teach you everything you need to begin creating your own website.
To begin writing the code for your own web pages, you will need to download and install a good text editor for coding. The good news is that there are plenty of free text editors that can do this well. Here is a list of good text editors you can use to write your code:
Atom (Free, PC & Mac)
Visual Studio Code (Free, PC & Mac)
Notepad ++ (Free, PC only)
Sublime Text (Free, PC & Mac)
TextWrangler (Free, Mac only)
I prefer to use Visual Studio Code on Mac (and you’ll see this in screenshots throughout this tutorial series) but you can choose any code editor you like – they are all fairly similar to use.
All of the main code editors are very easy to use for creating HTML code. Basically, you open a new file, save it as a file which ends in .html and then type in your code. You can usually see all your folders and files listed on the side as well. Make sure you save your code when you make changes and refresh or reload the web page in your browser to see the changes you’ve made.
Here is a screenshot of the Visual Studio Code editor showing a list of folders on the left and the code on the right. You can work on multiple files in different tabs and also see the line numbers for your code next to each line of code.

Once you have downloaded your code editor, install and run it. Create a new file and save it as index.html – make sure that the file type is set to HTML (HyperText Markup Language). Your homepage should always be saved as index.html – by using the name index it will be recognised as the homepage in. You can name your other pages whatever you like eg. about.html or contactus.html – but it is good practice to not use spaces in your filenames.
Watch the video below to see how to build your very first web page and then scroll down to see the code and find out what is happening on each line of code.
Take a look at the sample HTML code below and then scroll down to find out what each line of code does.
The first line tells the browser that the file or document type is HTML. The second line is the opening <html> tag for the HTML document which is paired with the closing </html> tag on the last line. The <html> tag indicates that your HTML code begins here. All of your code goes between the <html> and </html> tags.
<head> is the first section of the HTML document which contains background information about your webpage. This includes the character set that will be used (UTF-8, which represents every character in the Unicode set) and things such as the title of the web page which is usually displayed at the top of the browser window or as a label on your browser tab.

Note that the <head> tag is paired with the </head> tag. Whatever goes inside the <head> section is not actually displayed on your web page. It just includes background information about your webpage.
The next tag you will see is the <body> tag. Everything between the <body> and </body> tags is content that will be shown on your webpage. This includes text, images, tables, and other content.
The first HTML element (tag) we will use in the body section is the <p> tag which will make a paragraph of text. The content of your paragraph goes between the <p> and </p> tags. Create a new file and try it out!
Copy and paste the code from above in your new file, then click on File and Save As to save your text file as a HTML file. Choose a name for your file and end it in the .html file extension. If this is going to be your homepage, then name it index.html – also, if the option is available then make sure you choose “Hypertext Markup Language (.html)” next to “Save as Type”.

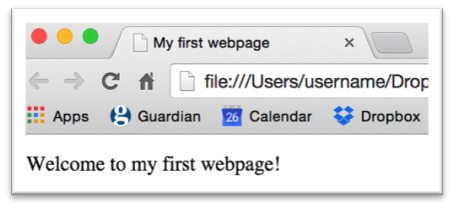
Save the file and open it with your web browser (eg. Chrome). Your page should look like this:
Next lesson: Paragraphs, line breaks and headings