Create a survival game with WoofJS
2D Game Design with WoofJS
In this lesson, you will learn how to create a game where the player is being chased and has to survive for as long as possible without getting caught by the enemy. In the example below, the smiley emoji has to avoid being caught by the ghost emoji. You can customise this game as much as you like with your own characters.

Step 1
Go to woofjs.com, log in and create a new project. The first thing we will do is change the backdrop colour using the setBackdropColor() function. You can either provide the name of the desired colour eg. setBackdropColor(“green”) or if you want to use a specific colour you can use a colour code (colour codes begin with a # and contain a combination of 6 numbers and letters from a to f). You can find colour codes at htmlcolorcodes.com (pick a colour and copy the ‘HEX’ code including the #). You can also use an image for your backdrop if you like using the setBackdropURL() function (refer to the previous two lessons).
Add the following line of code for a light green backdrop:

Step 2
Now we will create the player sprite. For the player sprite, will use an emoji image, set its width and height to 40 and position it in the middle of the screen (0 on the x and y axis). Add the following code:
Tip: All of this code can be squeezed into one line but to make it easier to read here, each property for the player variable has been added on a new line.

Step 3
Next, we can add the “Game over” message text and “Press P to play again” text which will display on the screen at the end of the game. Once you have added the two text objects, set them to be hidden using the gameOverText.hide() and playAgainText.hide() lines.
Add the following code:
Step 4
Now we can add movement for the player object. To do this, create a forever loop and add if statements checking if the arrow keys have been pressed on the keyboard. Add the relevant movement on the x or y axis for the player object in each if statement. Here is the code:

Now you should be able to move the player object (smiley emoji) around the screen using the arrow keys on the keyboard.
Step 5
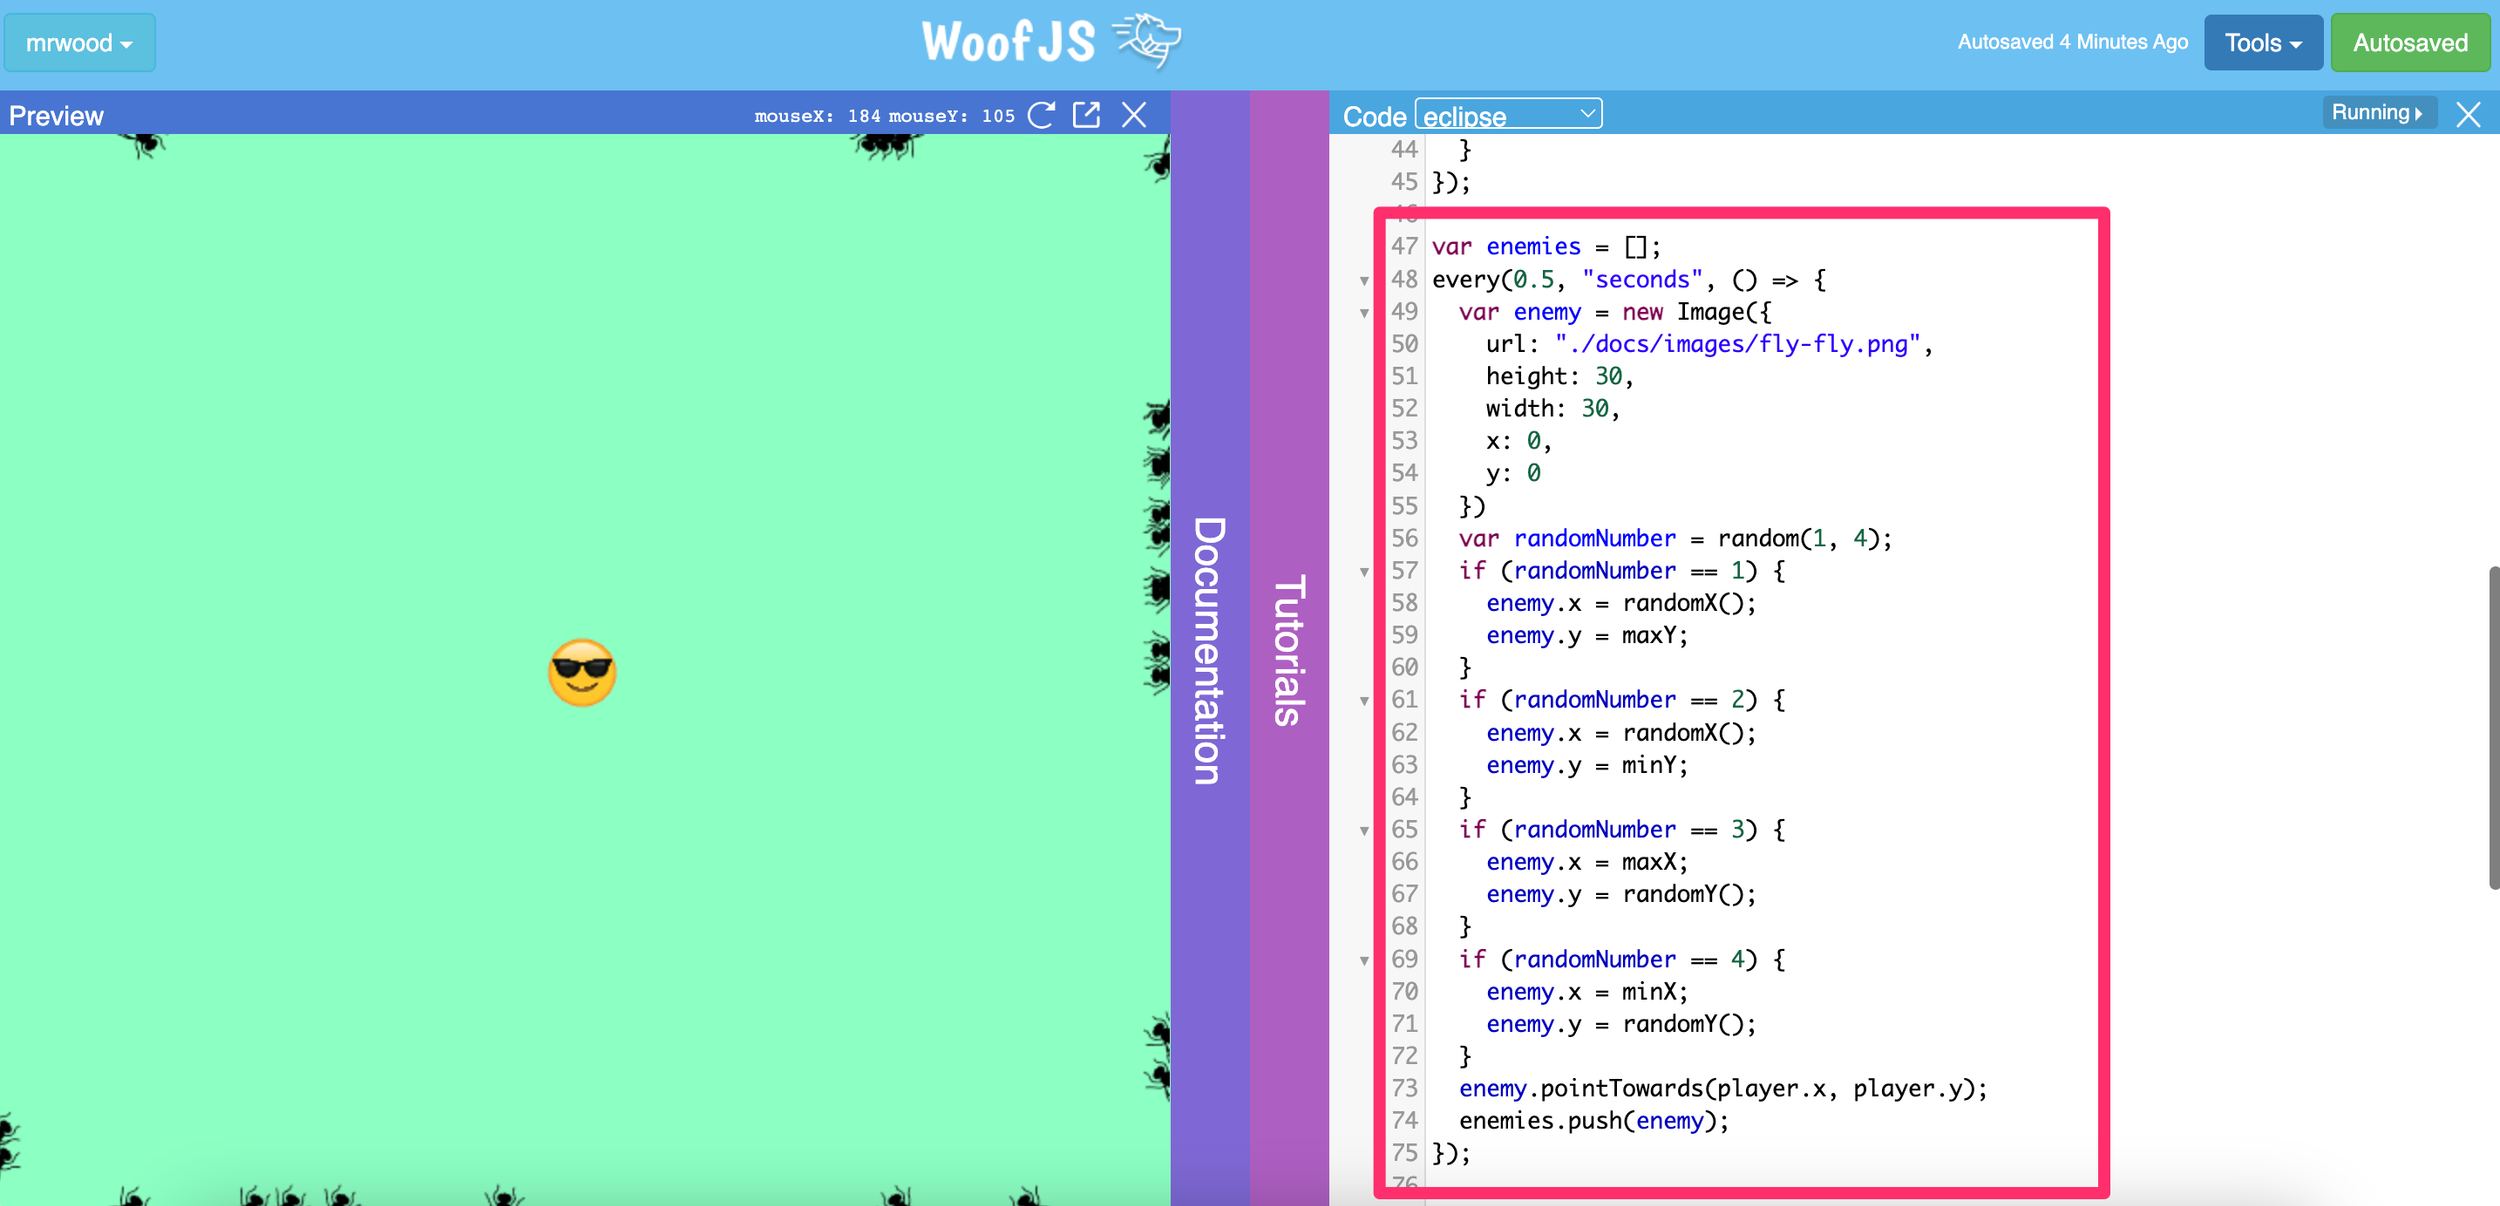
Now that we are able to move the player around, we can add enemies (pick one of WoofJS’ sprites or upload your own image) that will spawn in random locations at each edge of the screen pointing towards the player. Firstly, we create an empty array (an array is like a list) called enemies which will be used to store all of the enemy clones that will spawn during the game.
We will use the same enemy sprite for each individual enemy but every half a second, clone the enemy sprite and then use the randomNumber variable to determine which position the enemy clone should start from at different edges of the screen. Once the enemy clone spawns at a random location at the edge of the screen it will be pointed towards the player and added to the enemies array.
Step 6
Now that we can clone enemy sprites at different edges of the screen and point them towards the player, we will need to actually make them move towards the player. We can add a forever loop that will constantly get each individual enemy clone in the enemies array and move them (remember, each enemy clone is pointing towards the position of where the player was when that enemy clone spawned, so the enemy clones will move towards the player). We also make sure that each cloned enemy sprite is showing. Add the following code:

Step 7
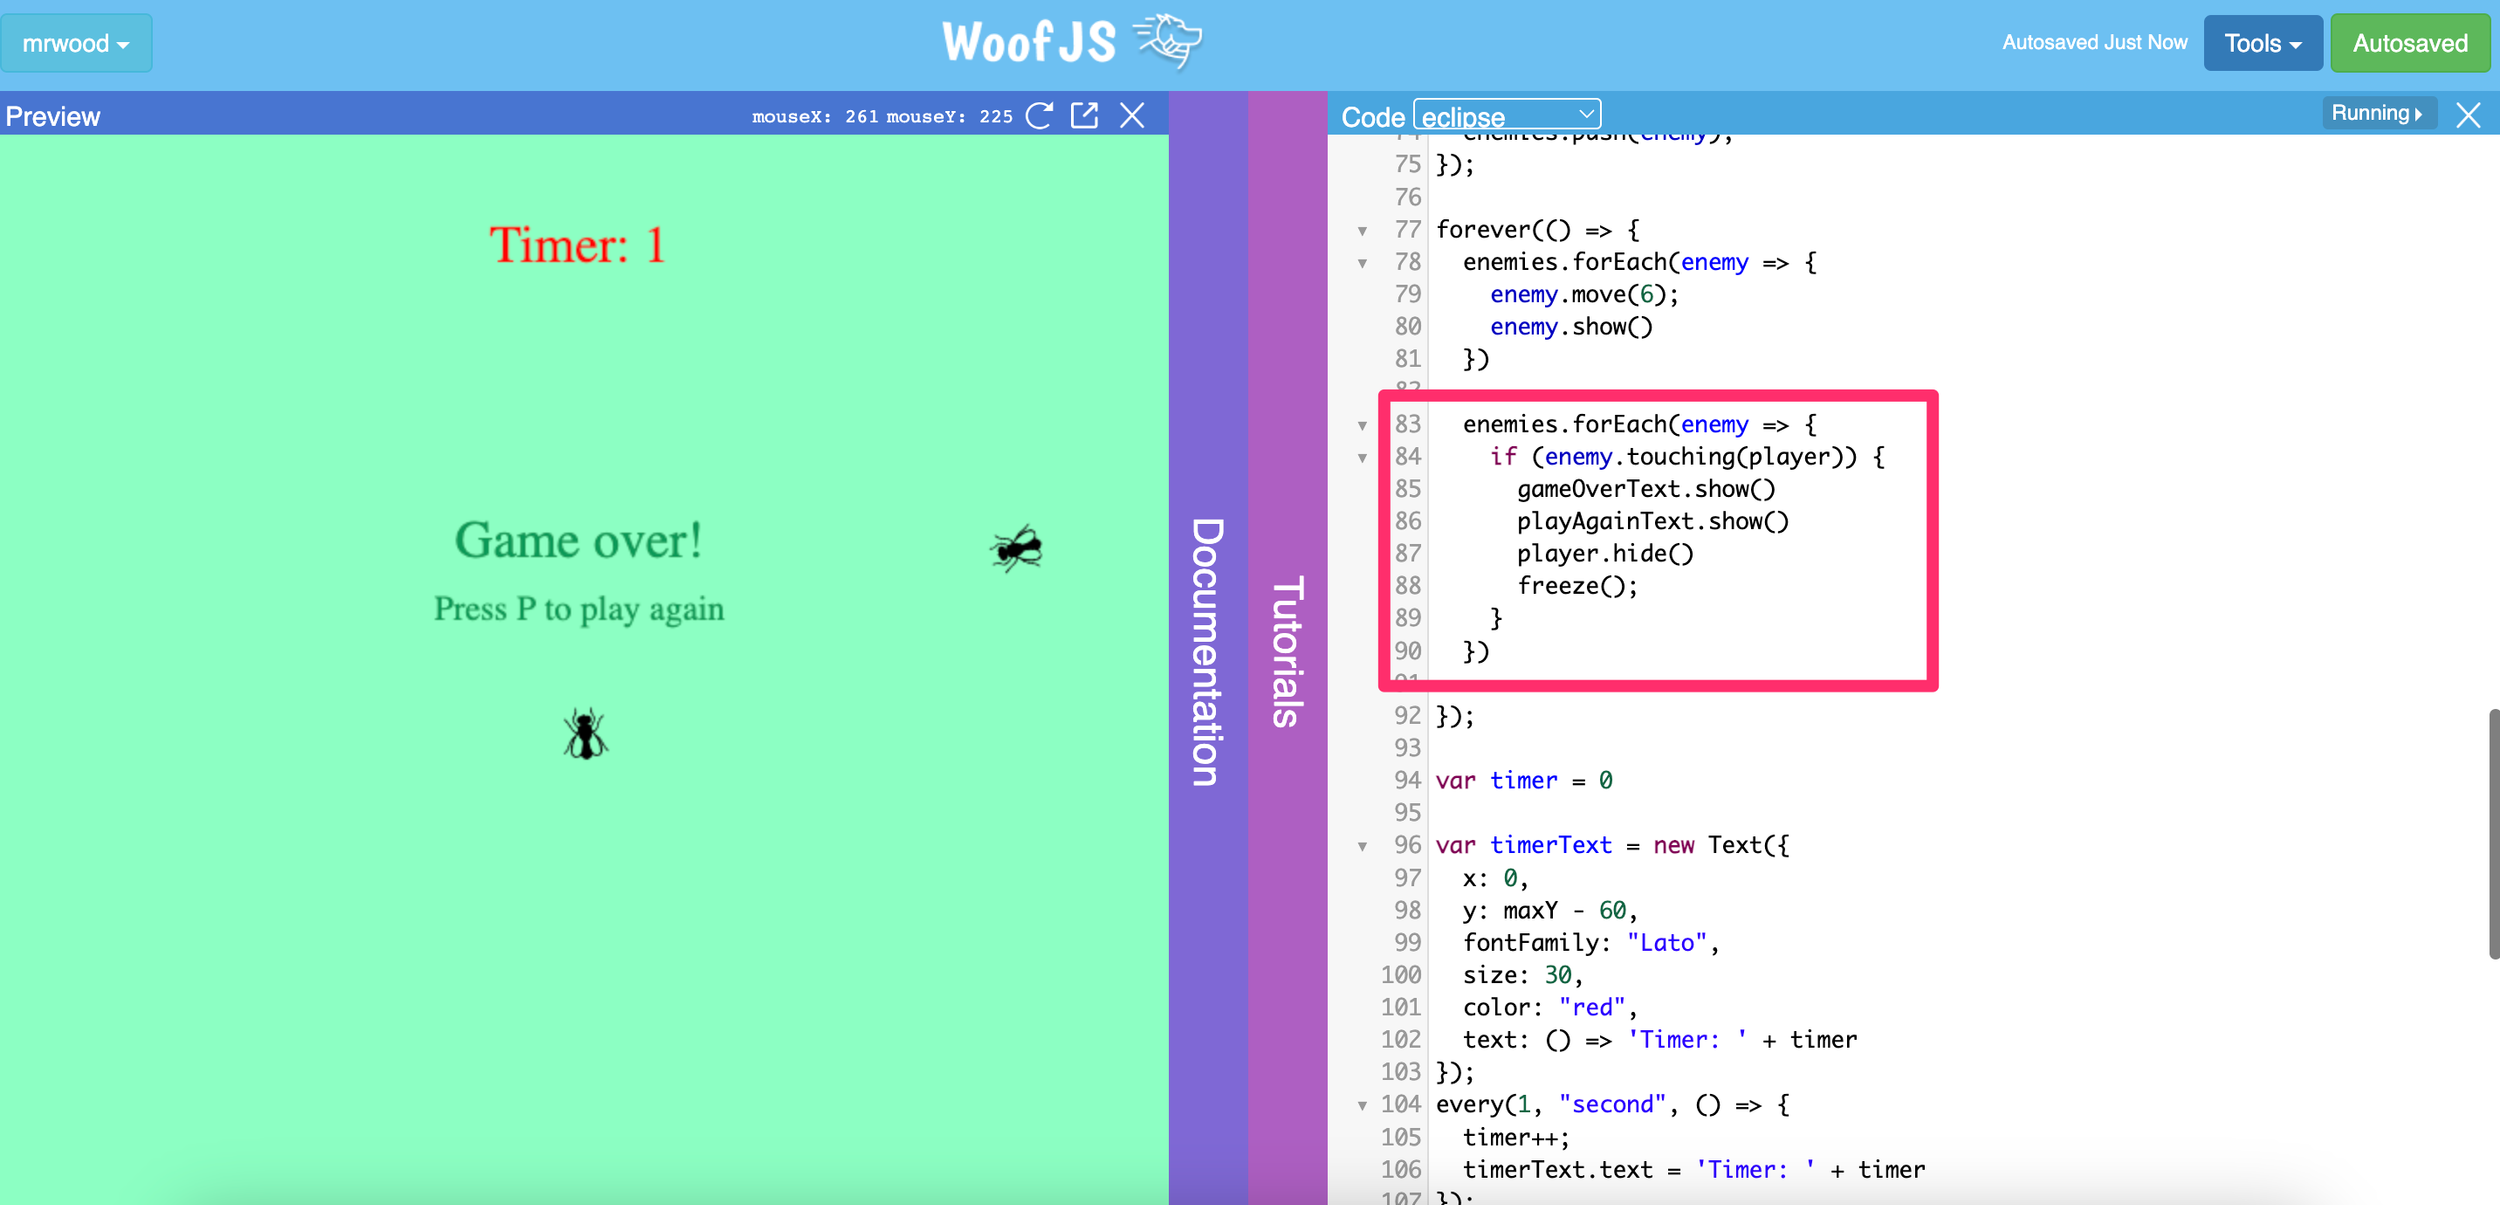
Now we can set up the timer which records how long the player has been running around without being caught by an enemy. First, we create a timer variable set to 0. Then we create the text which will display the timer on the screen. Then, every second we increase the timer by 1 and display the updated time on the screen. Add the following code:
At this point this is what the game should look like:

Step 8
Now we can some more code inside the existing forever loop block that will go through each enemy that exists in the enemies array and check if they are touching the player. If an enemy touches the player, then the “Game over” and “Press P to play again” text will be displayed on the screen. The player object will also be hidden and the freeze() function will be called which will freeze the screen.
Step 9
Next, we add some more code inside the existing forever loop block. This code will check if the P key is pressed on the keyboard and if so, then show the player object on the screen, hide the “Game over” and “Press P to play again” messages, and go through all the enemy clones which exist in the enemies array and delete each one. The enemies array is set to be an empty array again, the timer is set to 0, the player object is moved back to the centre of the screen, and the defrost() function is called which un-freezes the game. Add the following code:

Step 10
The final step is to add some more code inside the existing forever loop block that will ensure the player cannot leave the screen. By adding the following code in the forever loop, we can constantly check if the player is going beyond any edges of the screen, and if so, stop them from going any further. Add the following code to the forever loop block of code in your game project:
This is what the game and code will look like once you’re done!

Now play your game and see how long you can last without getting caught by an enemy! You can try adding a high score feature to the game and also adjust some of the variables to increase or decrease the speed of the enemy movements depending on how challenging you want the game to be. You could have the enemies start off moving slowly and gradually build up speed over time too. Make sure you save your work!
Complete code
Here is the complete code for the survival game.