Create a movie reviews app with Node.js and Express
Part 2 - Connecting the app to the database
Build web apps with NodeJS & Express
🕑 This lesson will take about 30 minutes
Step 1 - Create your database
Go to the MongoDB Atlas website and sign up for a free account or login to an existing account. Once you’re logged in, navigate to the Database tab and select ‘Build a database’.

Select the free “MO” database configuration option, AWS as the provider, and the closest region located to you as shown in the image below. You can also give your database cluster a name or just leave it as it is (eg. “cluster0”).

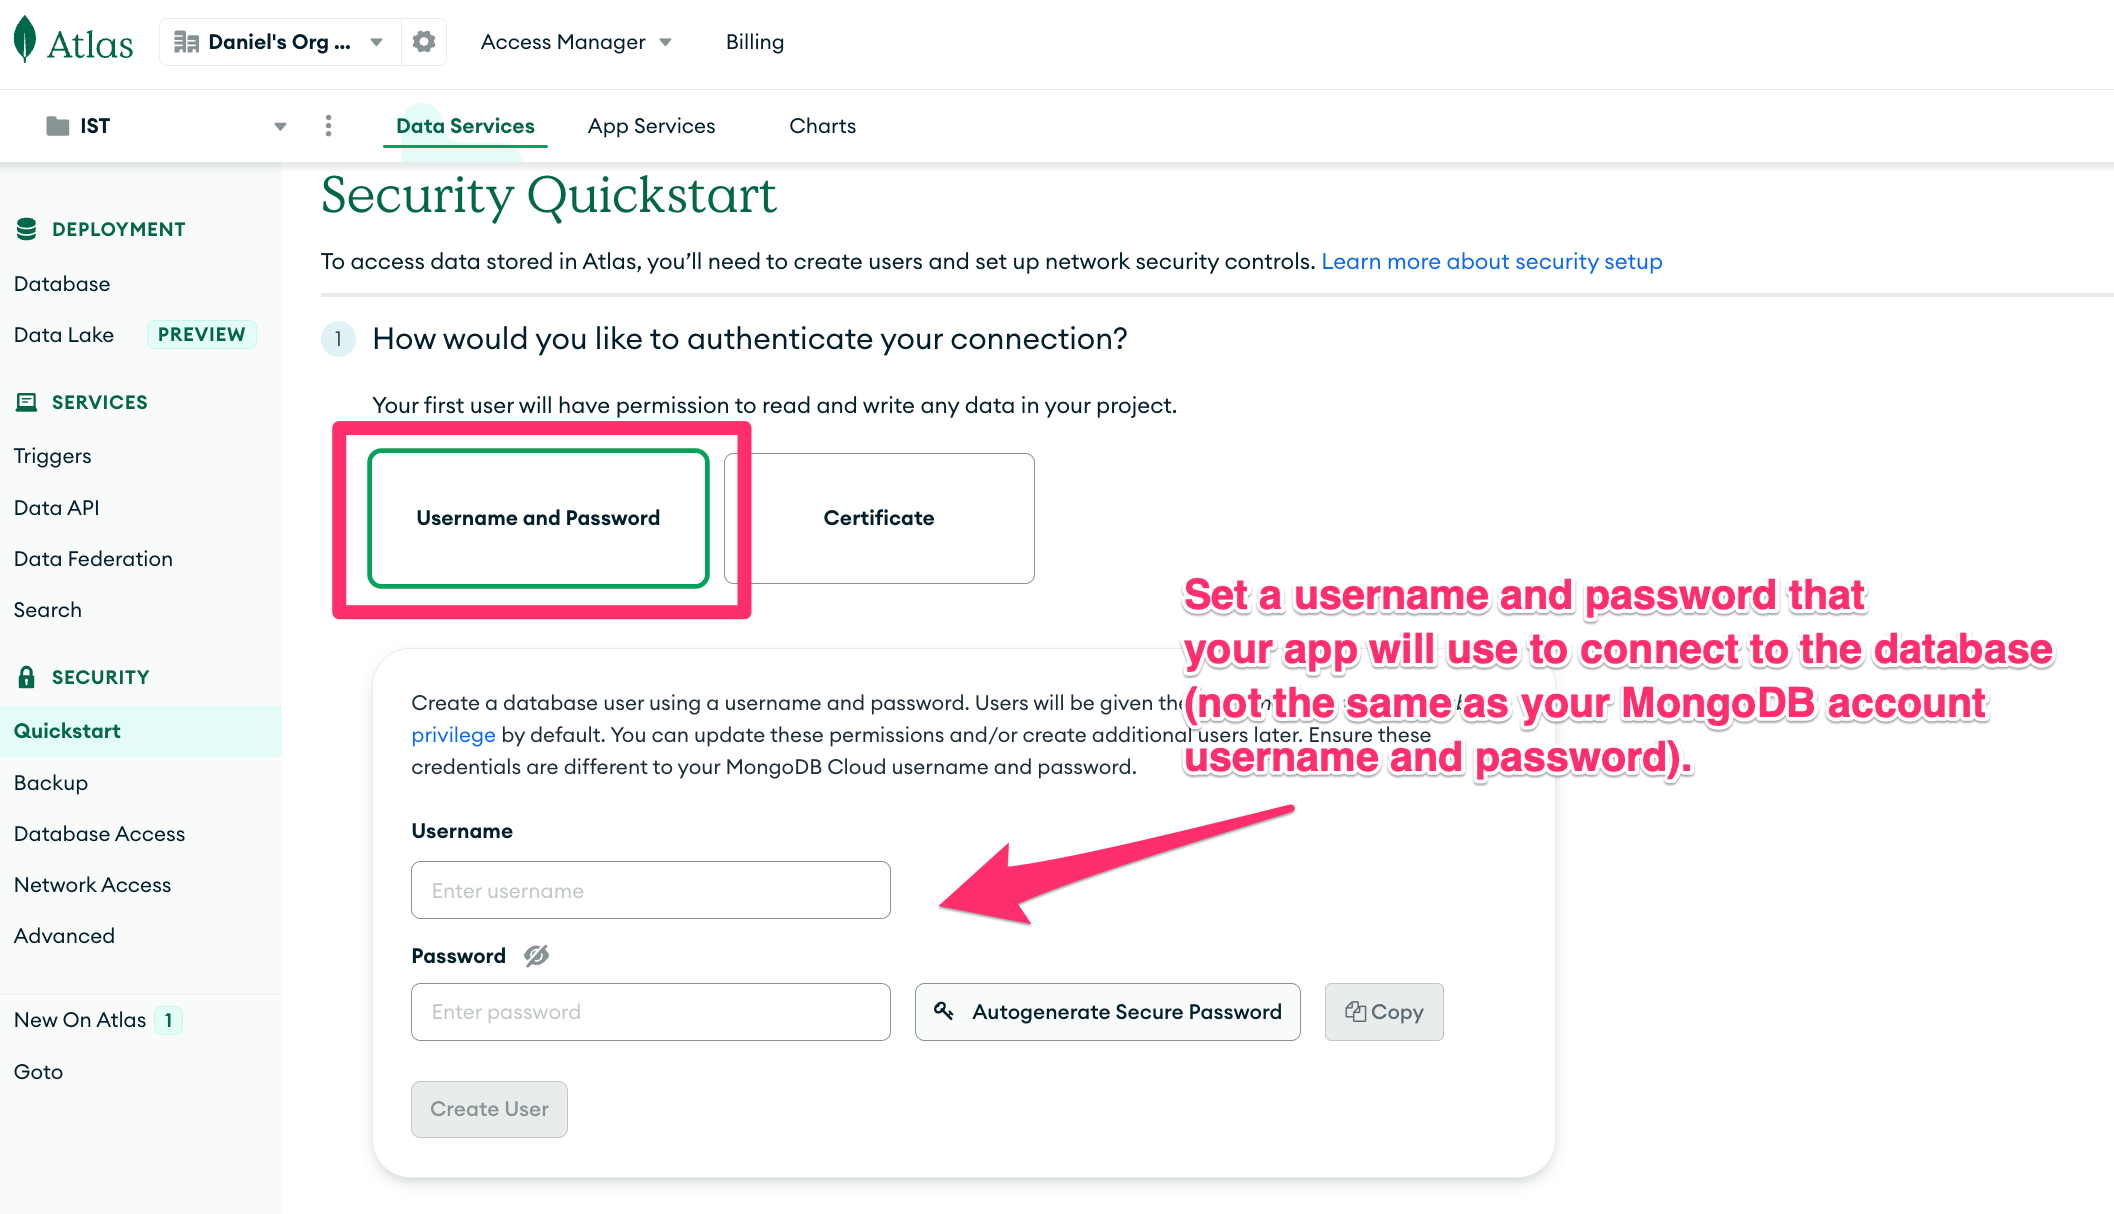
Now you can setup a database user account. Your app will use this account to connect to the database and to add, update, find, and delete records in the database. Keep a record of the username and password as you’ll need to copy these into your app’s code later so the app can connect to your database.
The username and password you choose should not be the same as your MongoDB account username and password.
Make sure your password is unique and one that you don’t use for any other websites/apps as this password will be visible in your code during testing
Do not include an @ character in your password as this may cause problems when using the link to connect to your database.
Once you have chosen a username and strong password, click Create user.
Note: This can be done from the ‘Quickstart’ page or from the ‘Database access’ page. You can manage your database accounts (add accounts, change passwords or permissions) from the ‘Database access’ page later.
Next, you’ll need to specify which IP addresses are allowed to connect to your database. Select the “My local environment option”. If you’re connecting to your database from a server running on the same device, you can select “Add my current IP address”. If you are using replit.com or you might be connecting to the app from different IP addresses, then you can enter 0.0.0.0 as an IP address which will allow any IP address to connect to your app. Then click “Finish and close”.
Note: You can change these settings later from the “Network access” page.

You have just created your first MongoDB database! Now its time to connect your app to the database.
From the “Database” page, click the “Connect” button next to your newly created database cluster (note: it may take a few minutes for the cluster to setup and appear here the first time).

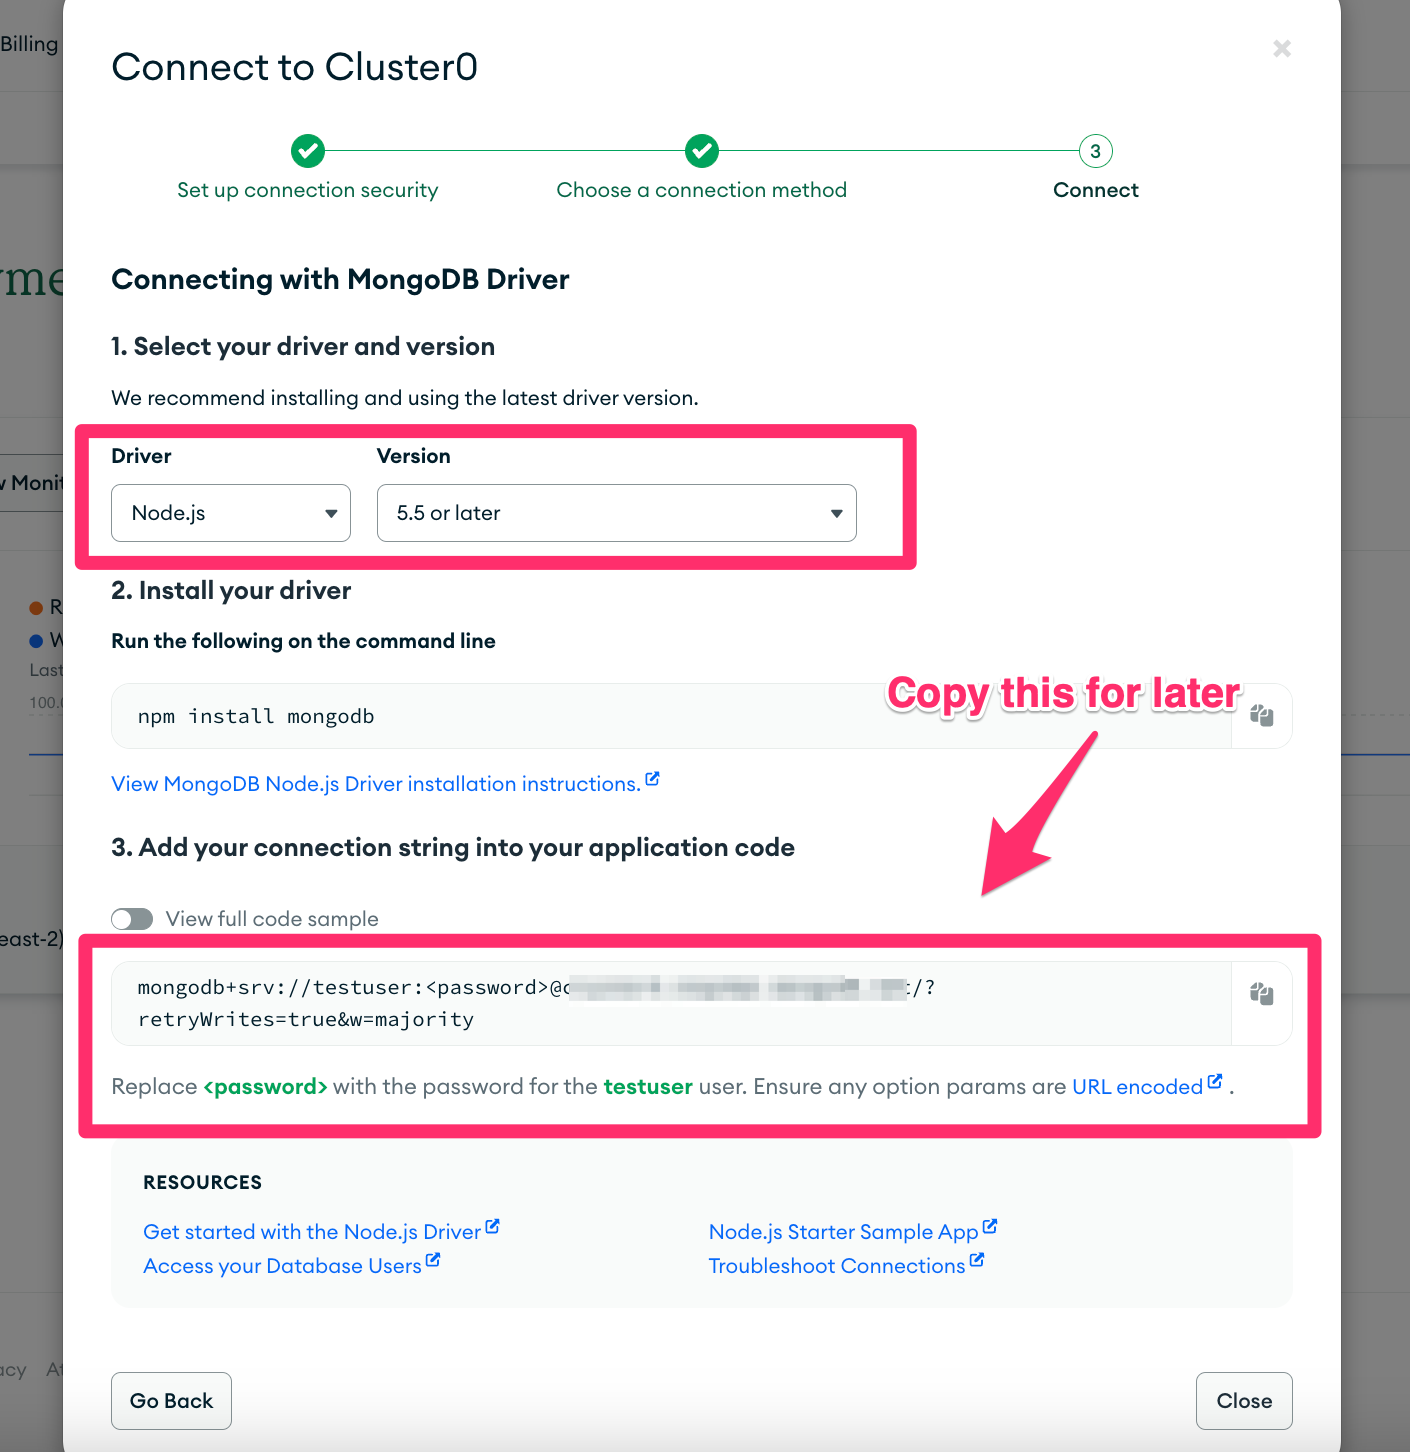
Select the “Drivers” option.

Choose Node.js from the Driver list and your version (eg. 5.5 or later). You can skip Step 2 (we will use the mongoose package instead of mongodb package for our app). Copy the connection string under Step 3 - you’ll need to add this to your code later and replace <password> with the actual password for your database user.
Now you can start connecting your app to the database. Open the index.js file - this is where the code will be added for connecting to the database, requesting information from the database, and adding information to the database as well as handling all of the different routes.
Step 2 - Connect the app to the database
If you haven’t already installed the mongoose package for your project, run the command npm i mongoose in your terminal (this was covered in the previous lesson).
Create a new file in your app’s project directory/folder and name it index.js . Add the following code to your index.js file and save the file. Replace the value in the db constant with the database connection string you copied earlier. Make sure you replace <password> with the password you set for the database user. Your db connection string will look something like this:
const db = "mongodb+srv://your_username:your_password@cluster0.something.mongodb.net/?retryWrites=true&w=majority";
The code you just added does the following:
Creates an instance of an Express app and specifies the packages the app will be using (express, mongoose, path, ejs).
Sets the view engine to EJS for rendering templates
Sets the ‘public’ directory where CSS and other static files will be stored
Specifies the connection string that will be used to connect to the MongoDB database - check the username is correct and make sure you have replaced <password> with the actual database user password.
Calls the mongoose.connect() function to connect your app to the database.
Creates a route for GET requests for the home page
Starts the server using localhost port 3000
Now run the command node index.js in your terminal to start the server (or click Run if using replit.com). If your app successfully connected to the database, then you should see the message “MongoDB connected” in the terminal.

-
If you don’t see the “MongoDB connected” message in the terminal, you can try the following troubleshooting steps:
Check your database configuration is correct on the MongoDB Atlas website:
Have you created a database cluster and is it ready for use (on the Database page)?
Have you created a database user and specified a username and password (on the Database Access page)?
Have you added your current IP address to the whitelist or 0.0.0.0 to connect to your database from any IP address (on the Network Access page)?
Check that your database connection string is for the Node.js version you are using and that the string is correct
Have you checked the username and password are correct in the db connection string?
Make sure there is no @ character or any other unaccepted characters in your database user's password
Have you replaced <password> with the correct password in the connection string and removed the < and > characters?
Your network might be blocking connections to the database. If this is the case, try using a hotspot or other network and see if that works.
Now that your app is connected to the database, you can start to define the type of information it will store and start adding some data to the database.
Next lesson: Create a Movie Reviews App (Part 3 - Create a schema and add data to the database)