Control LED brightness using a potentiometer
Arduino Uno tutorials
🕑 This lesson will take about 20 minutes
Potentiometers are variable resistors that function to alter their resistance via a knob or a dial. They are often used to adjust volume on speakers, temperature on an oven or toaster, or the brightness of lights. Potentiometers have a range of resistance that can be attuned from zero Ohms to the maximum resistance that the potentiometer provides (eg. a 10K Ohm potentiometer can be adjusted from 0 Ohms to its maximum of 10k Ohms).
In this lesson, you will learn how to use a potentiometer to adjust the brightness of an LED.

Potentiometer
Parts required
1 x Arduino Uno
1 x LED
1 x potentiometer
1 x resistor (can be any value between 100 Ohms and ~10K Ohms). We will use a 220 Ohm resistor in this example.
7 x male-to-male jumper wire
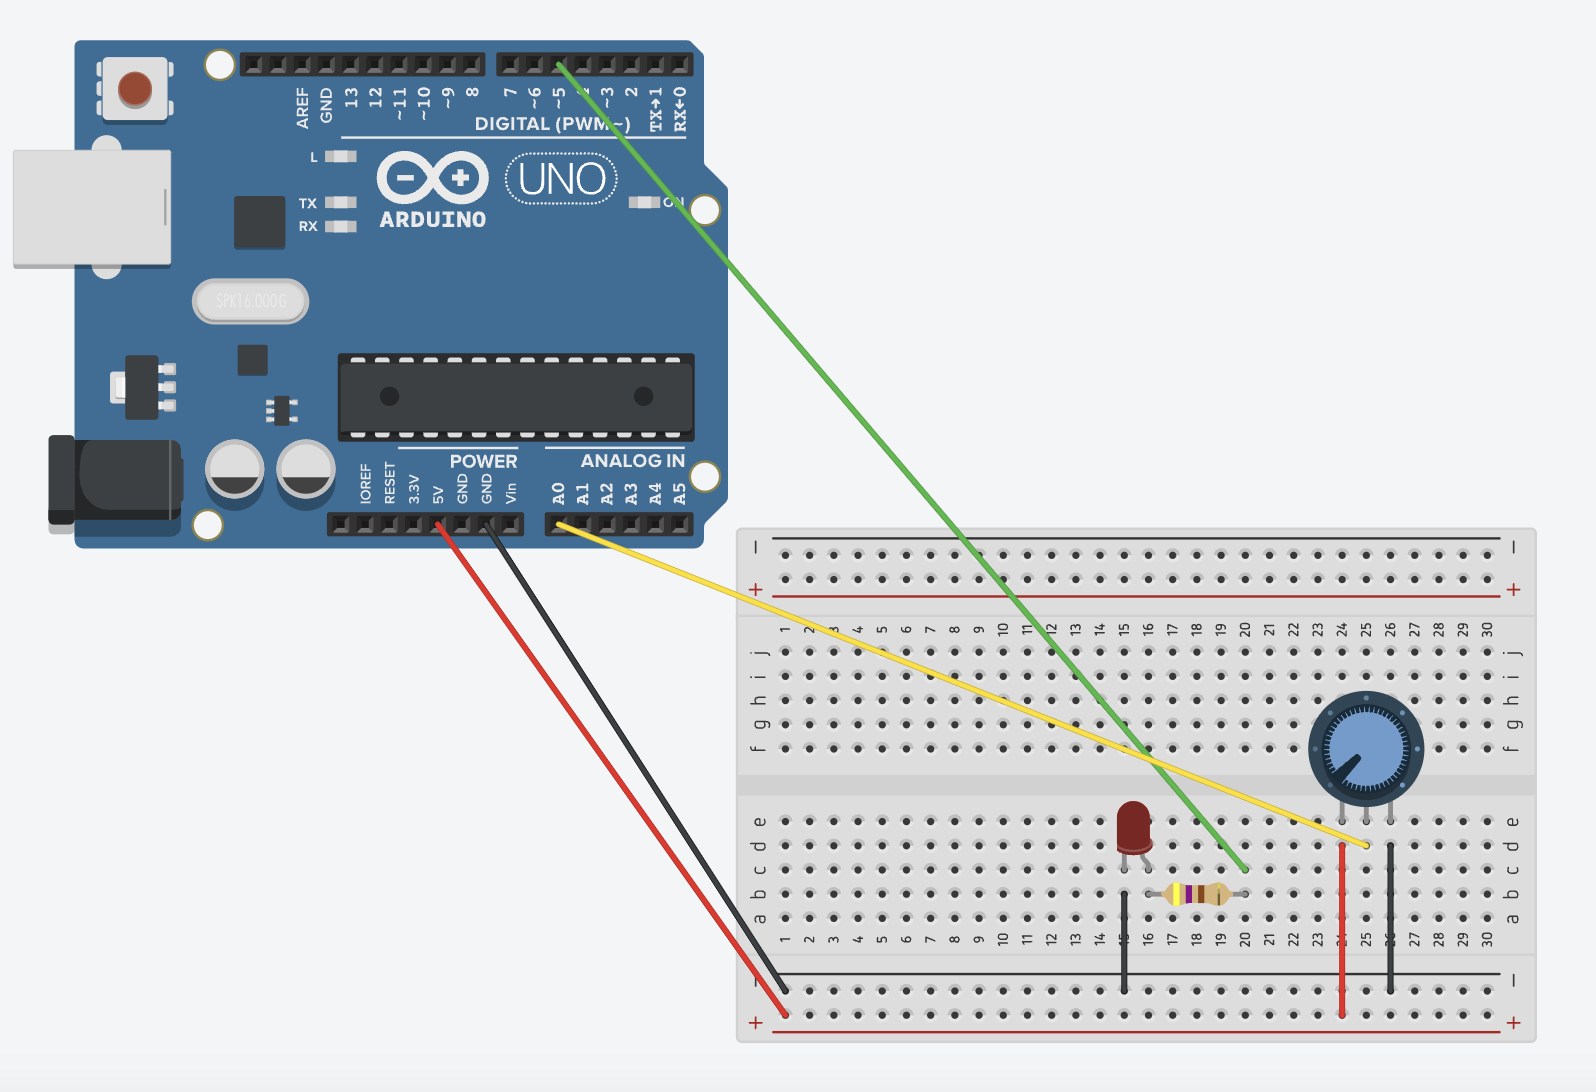
Wiring schematic
Connect the long pin of the LED to PWM pin 5 on the Arduino via a 220 Ohm resistor on the breadboard
Connect the short pin of the LED to an empty GND slot on the Arduino
Connect the potentiometer to the Arduino - there are three pins: one connects to 5V, the centre pin connects to analog pin A0, and the other pin connects to GND on the Arduino.
The code
Upload the following code to the Arduino using the Arduino IDE software. You can also use the Serial Monitor to display the values from the potentiometer to test it out. If you’re not sure how to display sensor readings from the Arduino in the Serial Monitor, check out one of the previous lessons (eg. light sensor or ultrasonic sensor lessons).