Exploring the Django Admin
Building web applications with Python & Django
🕑 This lesson will take about 20 minutes
What is Django Admin?
In this lesson, we’re going to check out administration using Django. Django comes with an Admin site that can be accessed with a username and password. You will need to first create a super user (a user that has access to the database and the ability to create other users) before you can log in and create other user accounts. Other user types are called staff and user, which both have fewer permissions than a super user. You can create different users and groups that have different permissions and levels of access to the database.
Create a super user
To get started, run the following command in the VS Code terminal to start creating a new super user:
python3 manage.py createsuperuser
(or try running the command python manage.py createsuperuser if using Windows)
Once you run this command, you will be prompted to input a desire username, followed by an email address, and followed by a desired username (must be a combination of uppercase and lowercase letters as well as numbers and a special character).
For testing, I will use the following details:
Username: admin
Email: test@admin.com
Password: Test12345!
Note: You won’t be able to see the password as you’re typing, so enter it carefully (it must be entered twice and both passwords must match.
Login to the admin site
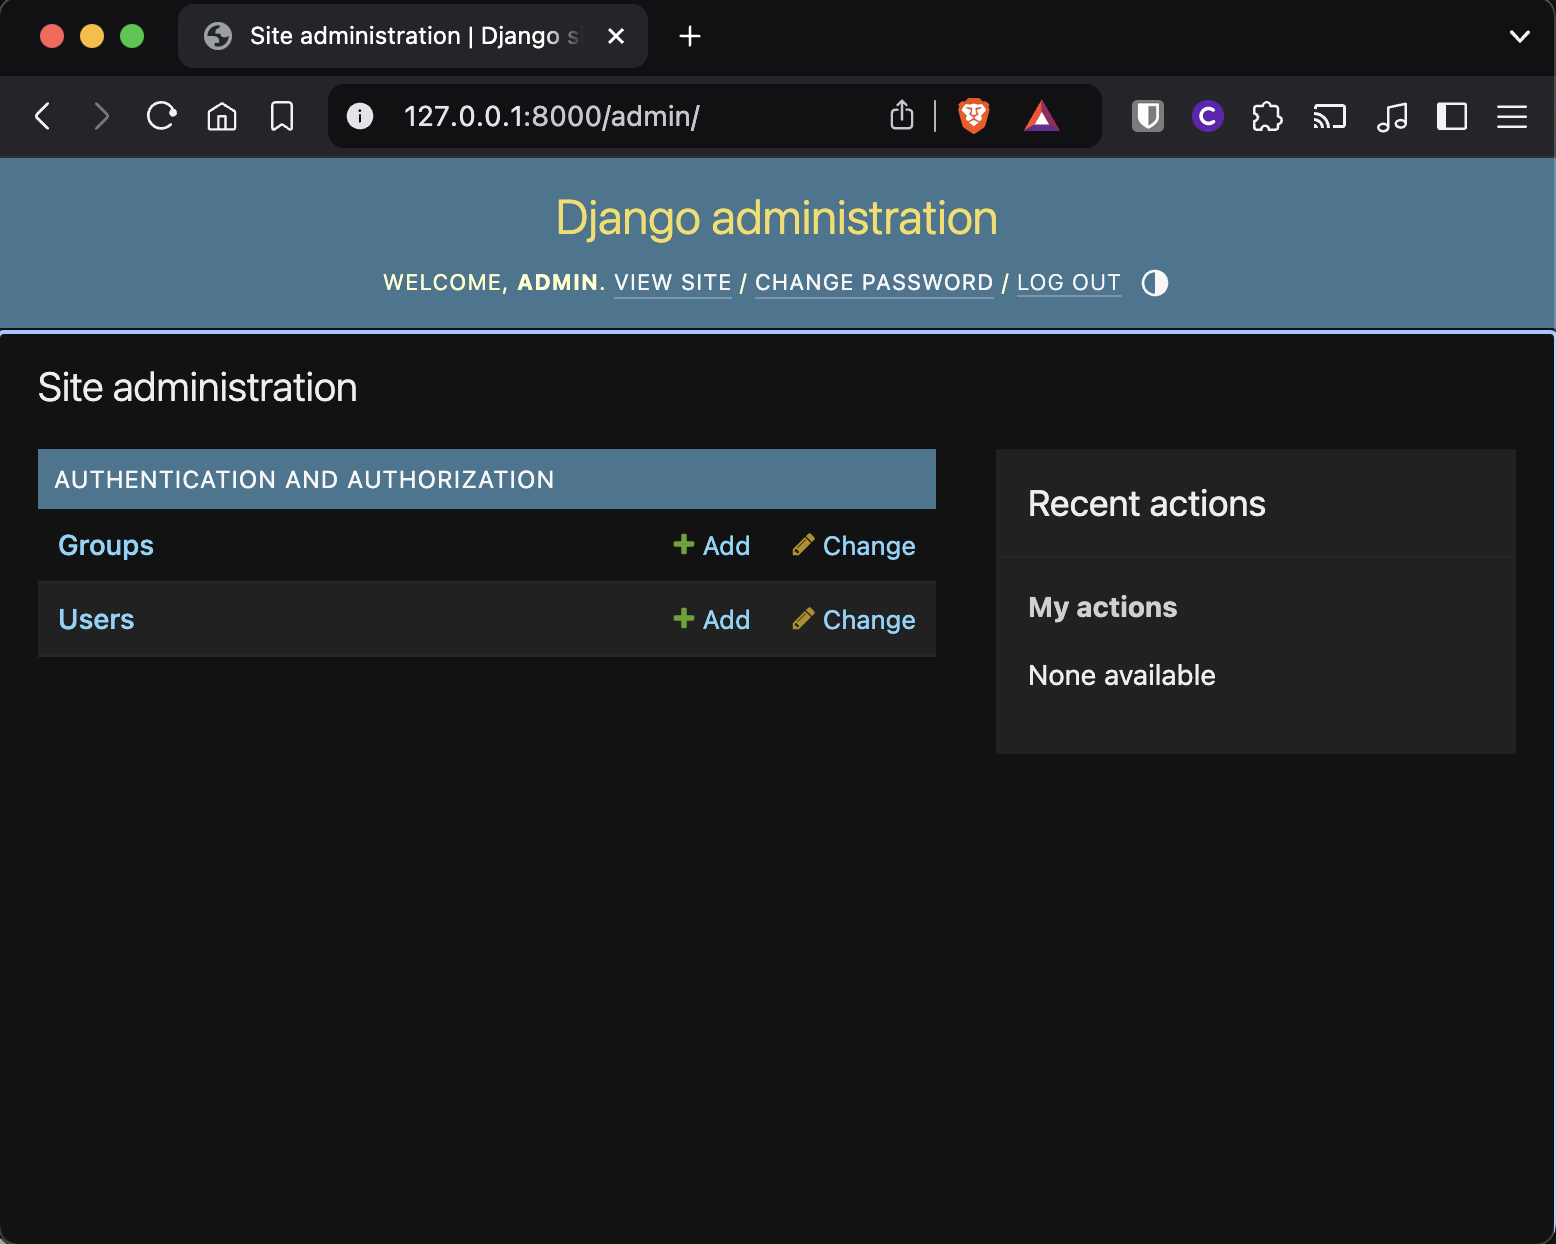
Now run the web server and access the admin (go to your web server’s homepage and replace the end of the URL with /admin (eg. http://127.0.0.1:8000/admin ). You will be prompted to log in using your username and password.
Once you’re logged in, you will be able to view and add Groups and Users.
Create a new user
Click the Add button next to Users to create a new user account. Specify a username and password for your new user and then click Save and continue editing.
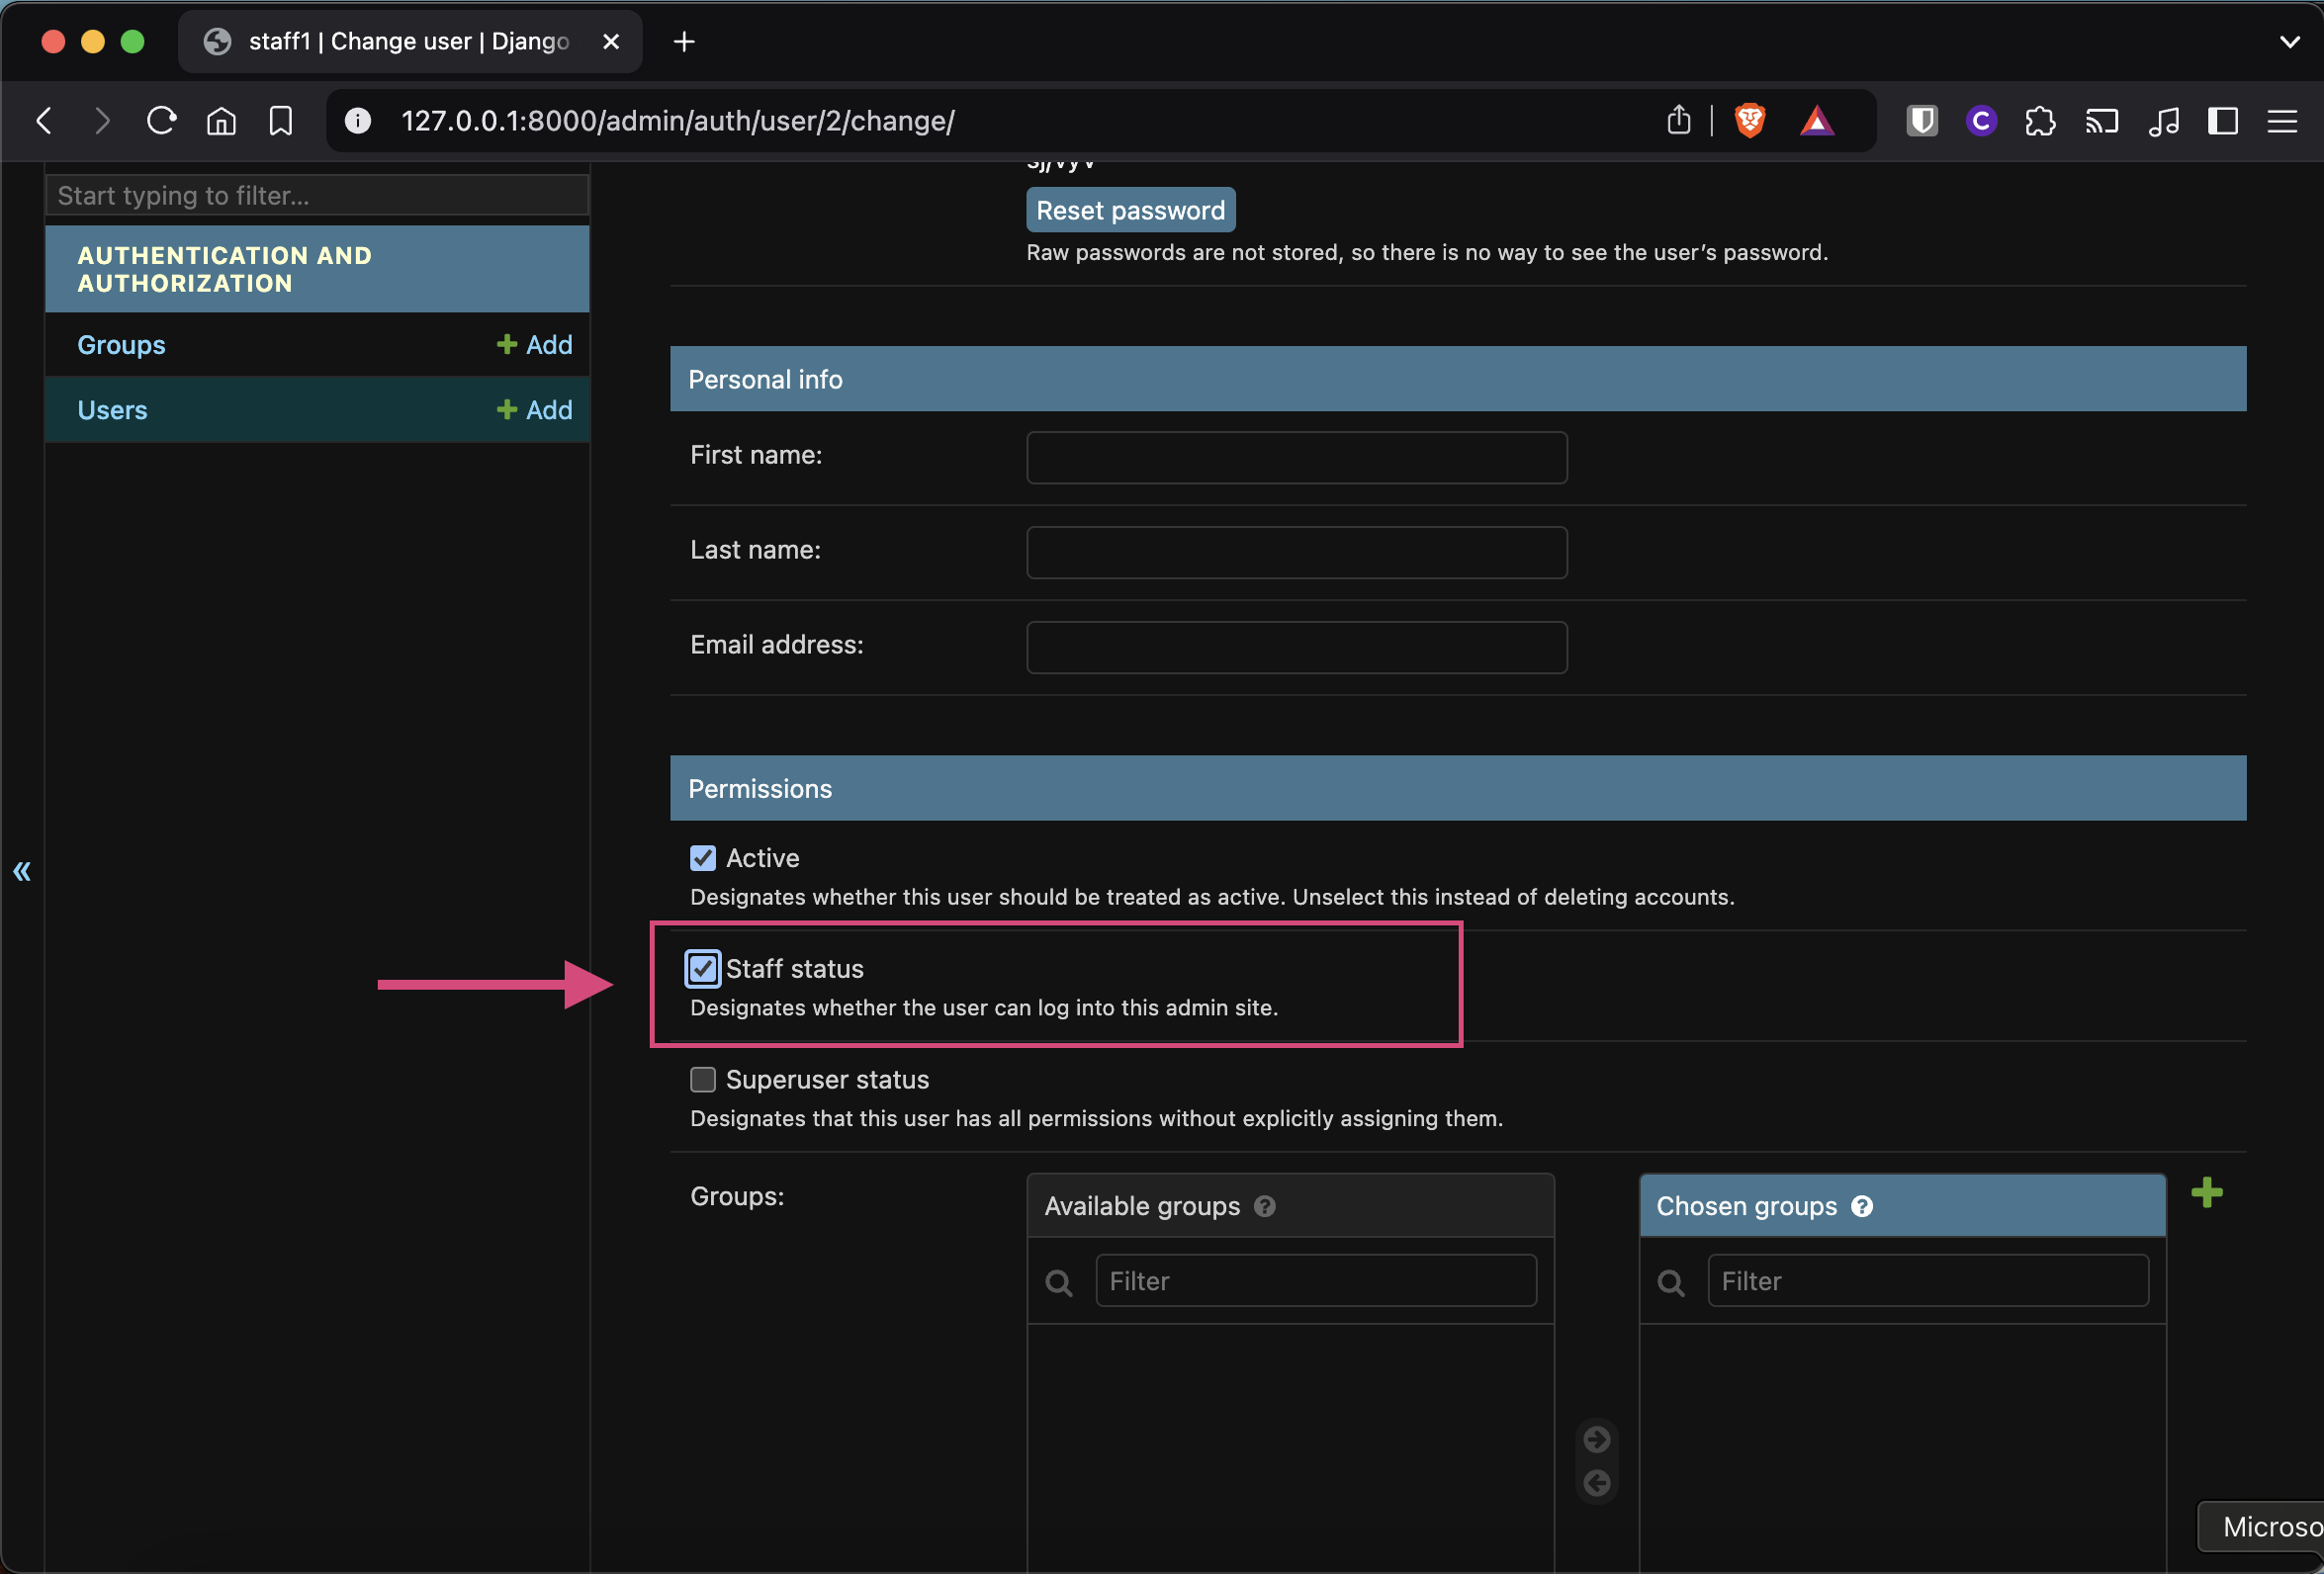
On the next screen, scroll down and make sure the box next to Staff Status is checked. Now click Save.
Return to the Users screen and you should now see the user you just created in the list of users.
Register models in the Admin
Open your admin.py file in your app folder (eg. in the myapp folder) and modify it so it now has the following code. Once saved, this will register the Destination and Cruise models so they can be accessed from the Admin site. This means you will be able to view, add, modify and delete records in the database from the Admin site.
Save the code and go back to the Admin site. Refresh the Admin home page and you should see now the models from your app listed on the admin page (make sure you are logged in as the super user). You will then be able to select a model (eg. Destination or Cruise) to view existing data, edit existing data, add new data, or delete data.
Adding data
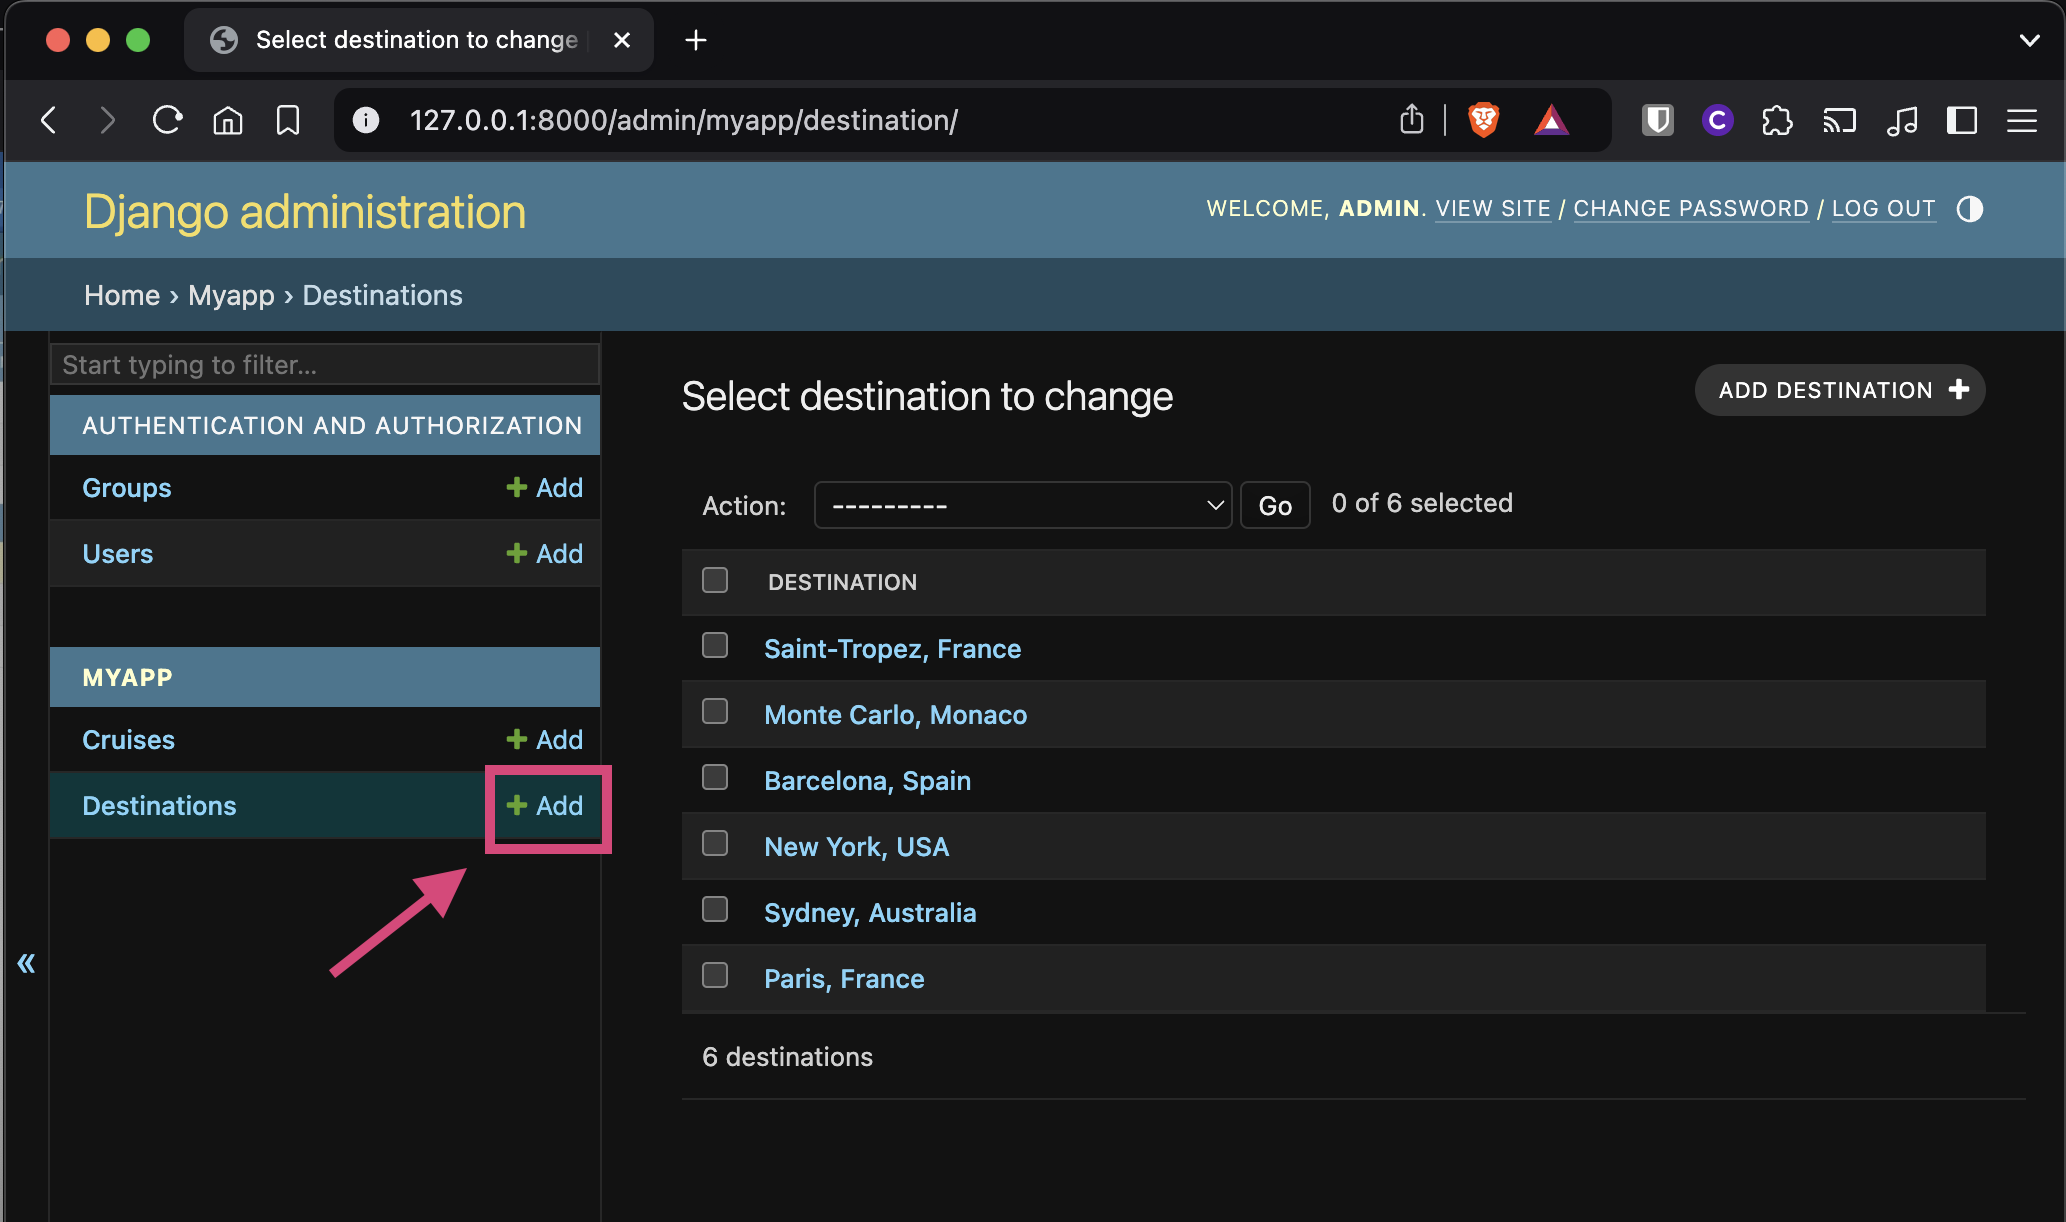
Now try out adding some new destinations and create a cruise that has a list of destinations in it. First, click the Add button next to Destinations and add some new destinations.
Next, click Add next to Cruises to add some new cruises. When creating a cruise, you can select from a list of destinations as the Cruise table is linked to the Destination table in the database.
Setting user permissions
When logged in as a superuser, you can edit other users and change their permissions (eg. allow another user to add or view records in the database but not be able to edit or delete records). You can create several different users each with different levels of access or permissions.
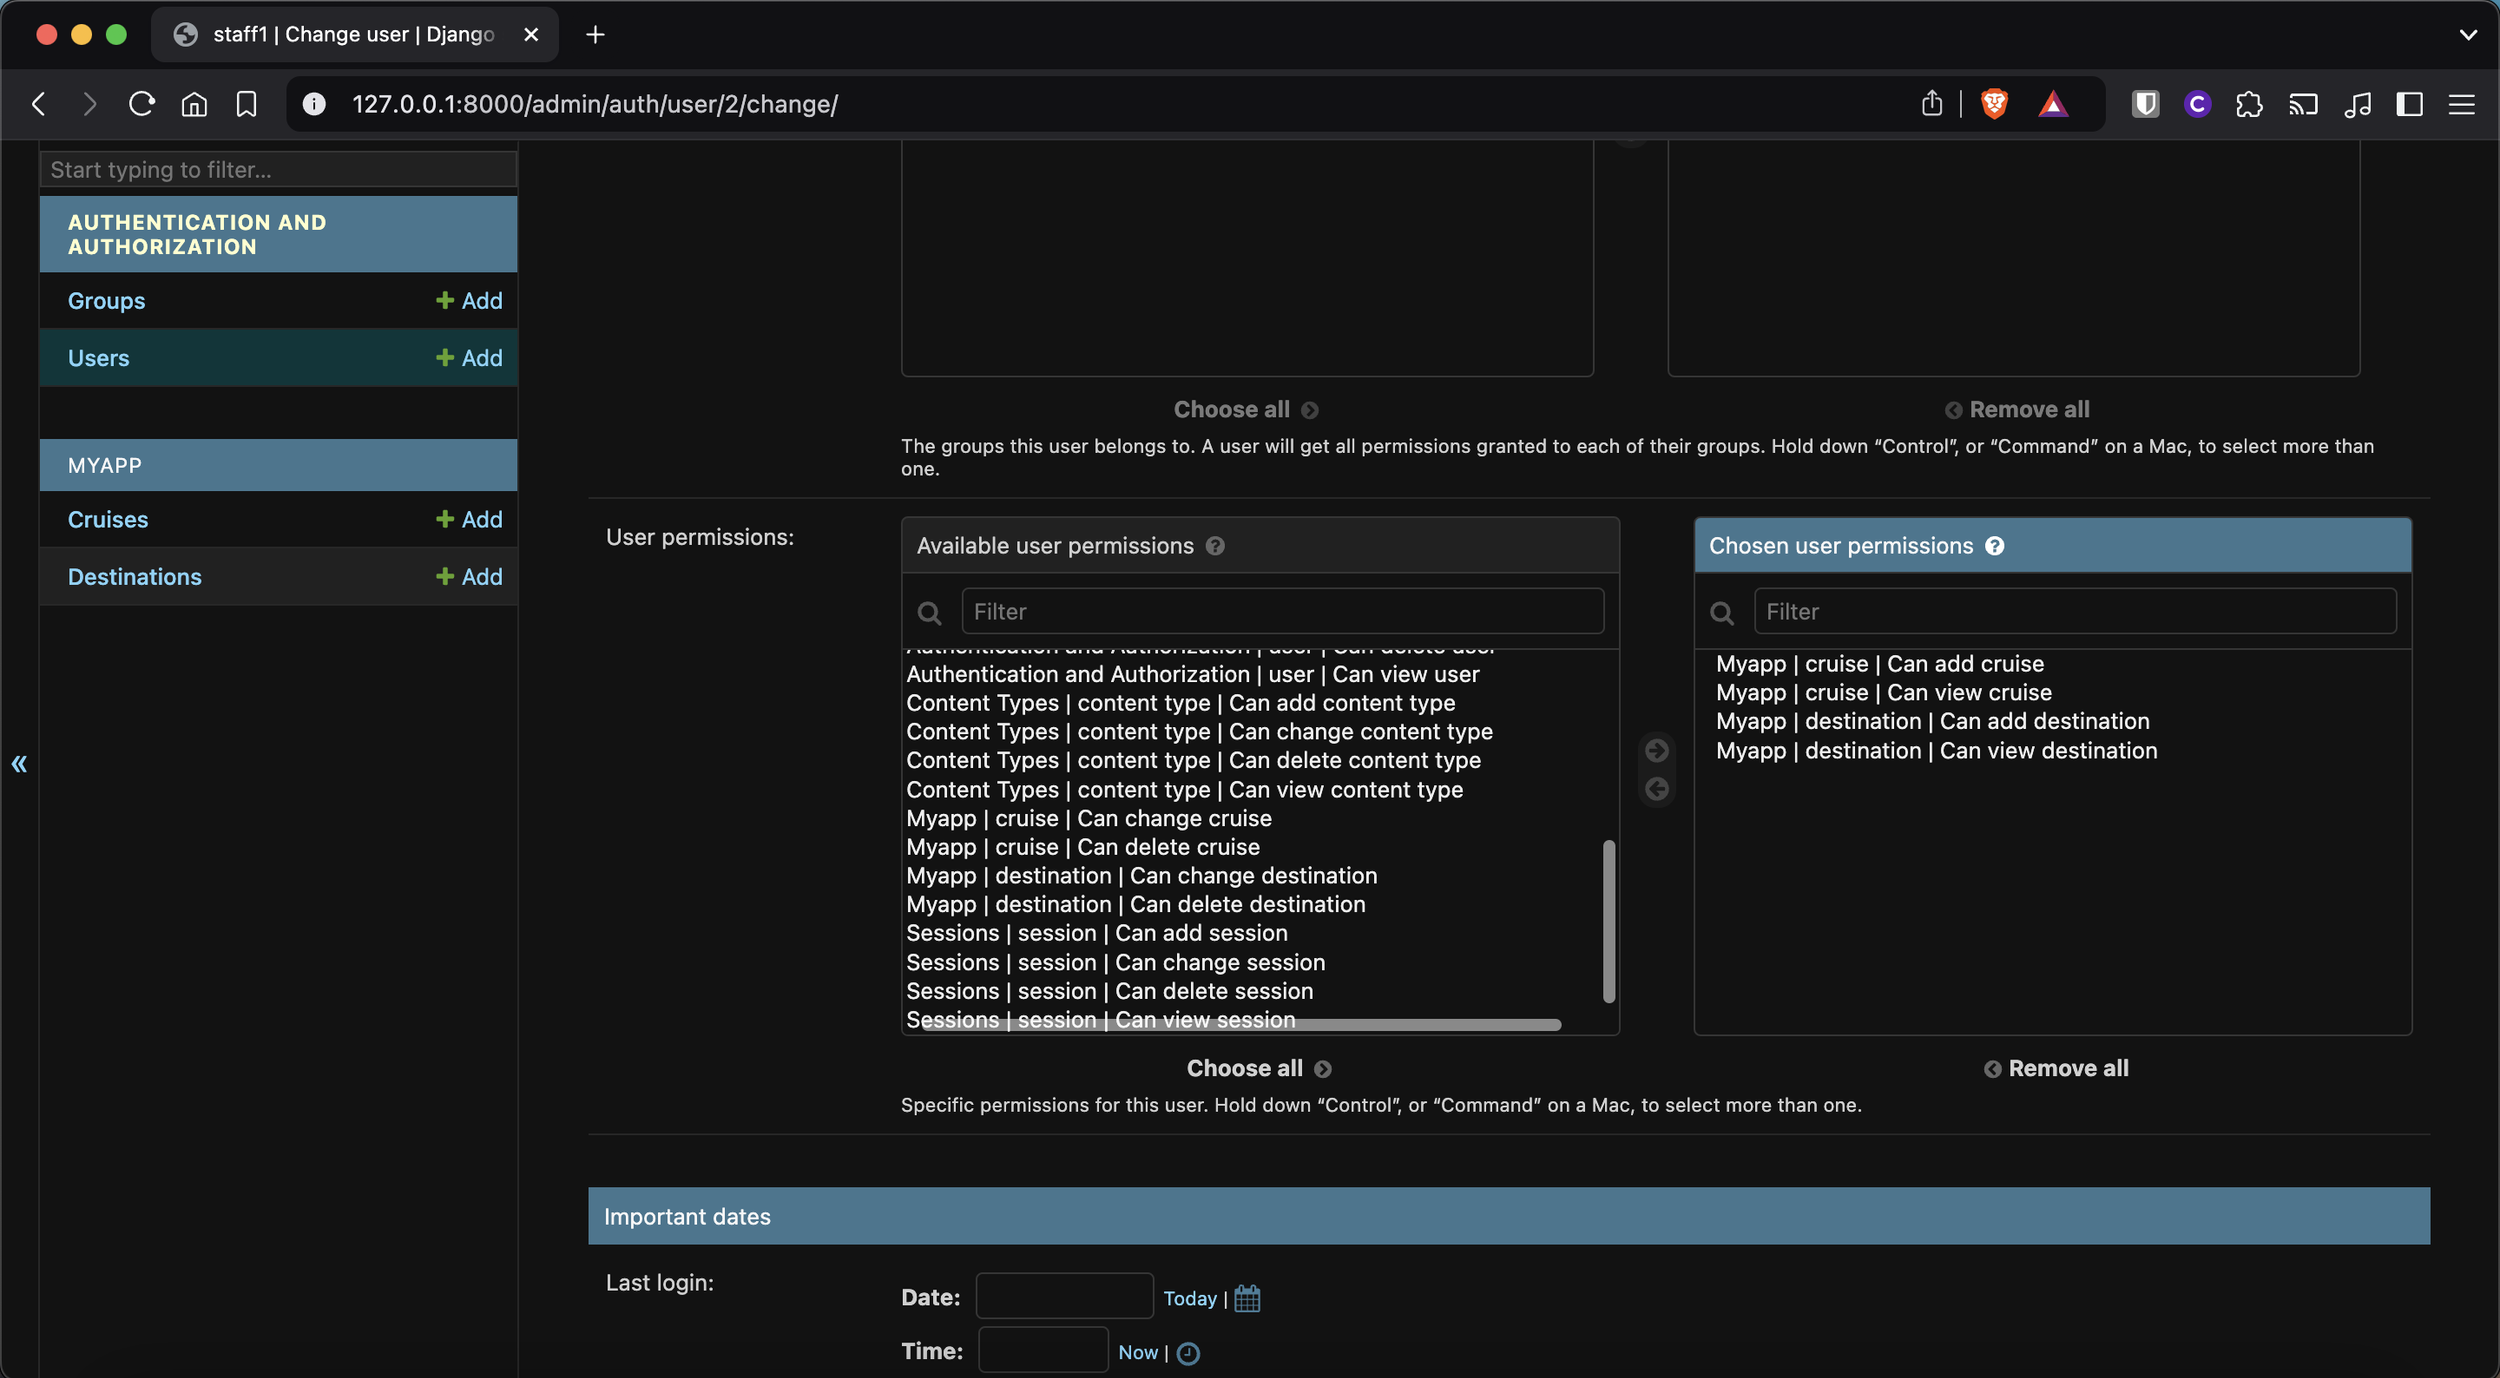
If you are currently logged into the Admin site as the super user, you should be able to view, add, edit, and delete data as you please. However, to allow other user accounts to have some or all of these permissions, you will need to set their permissions. As the super user, click on Users. Select a user you wish to edit and then scroll down until you see User Permissions. From the list on the left, select the permissions you would like the user to have and then click the right-arrow icon to add these permissions to chosen user permissions list. Then click Save.
Creating groups
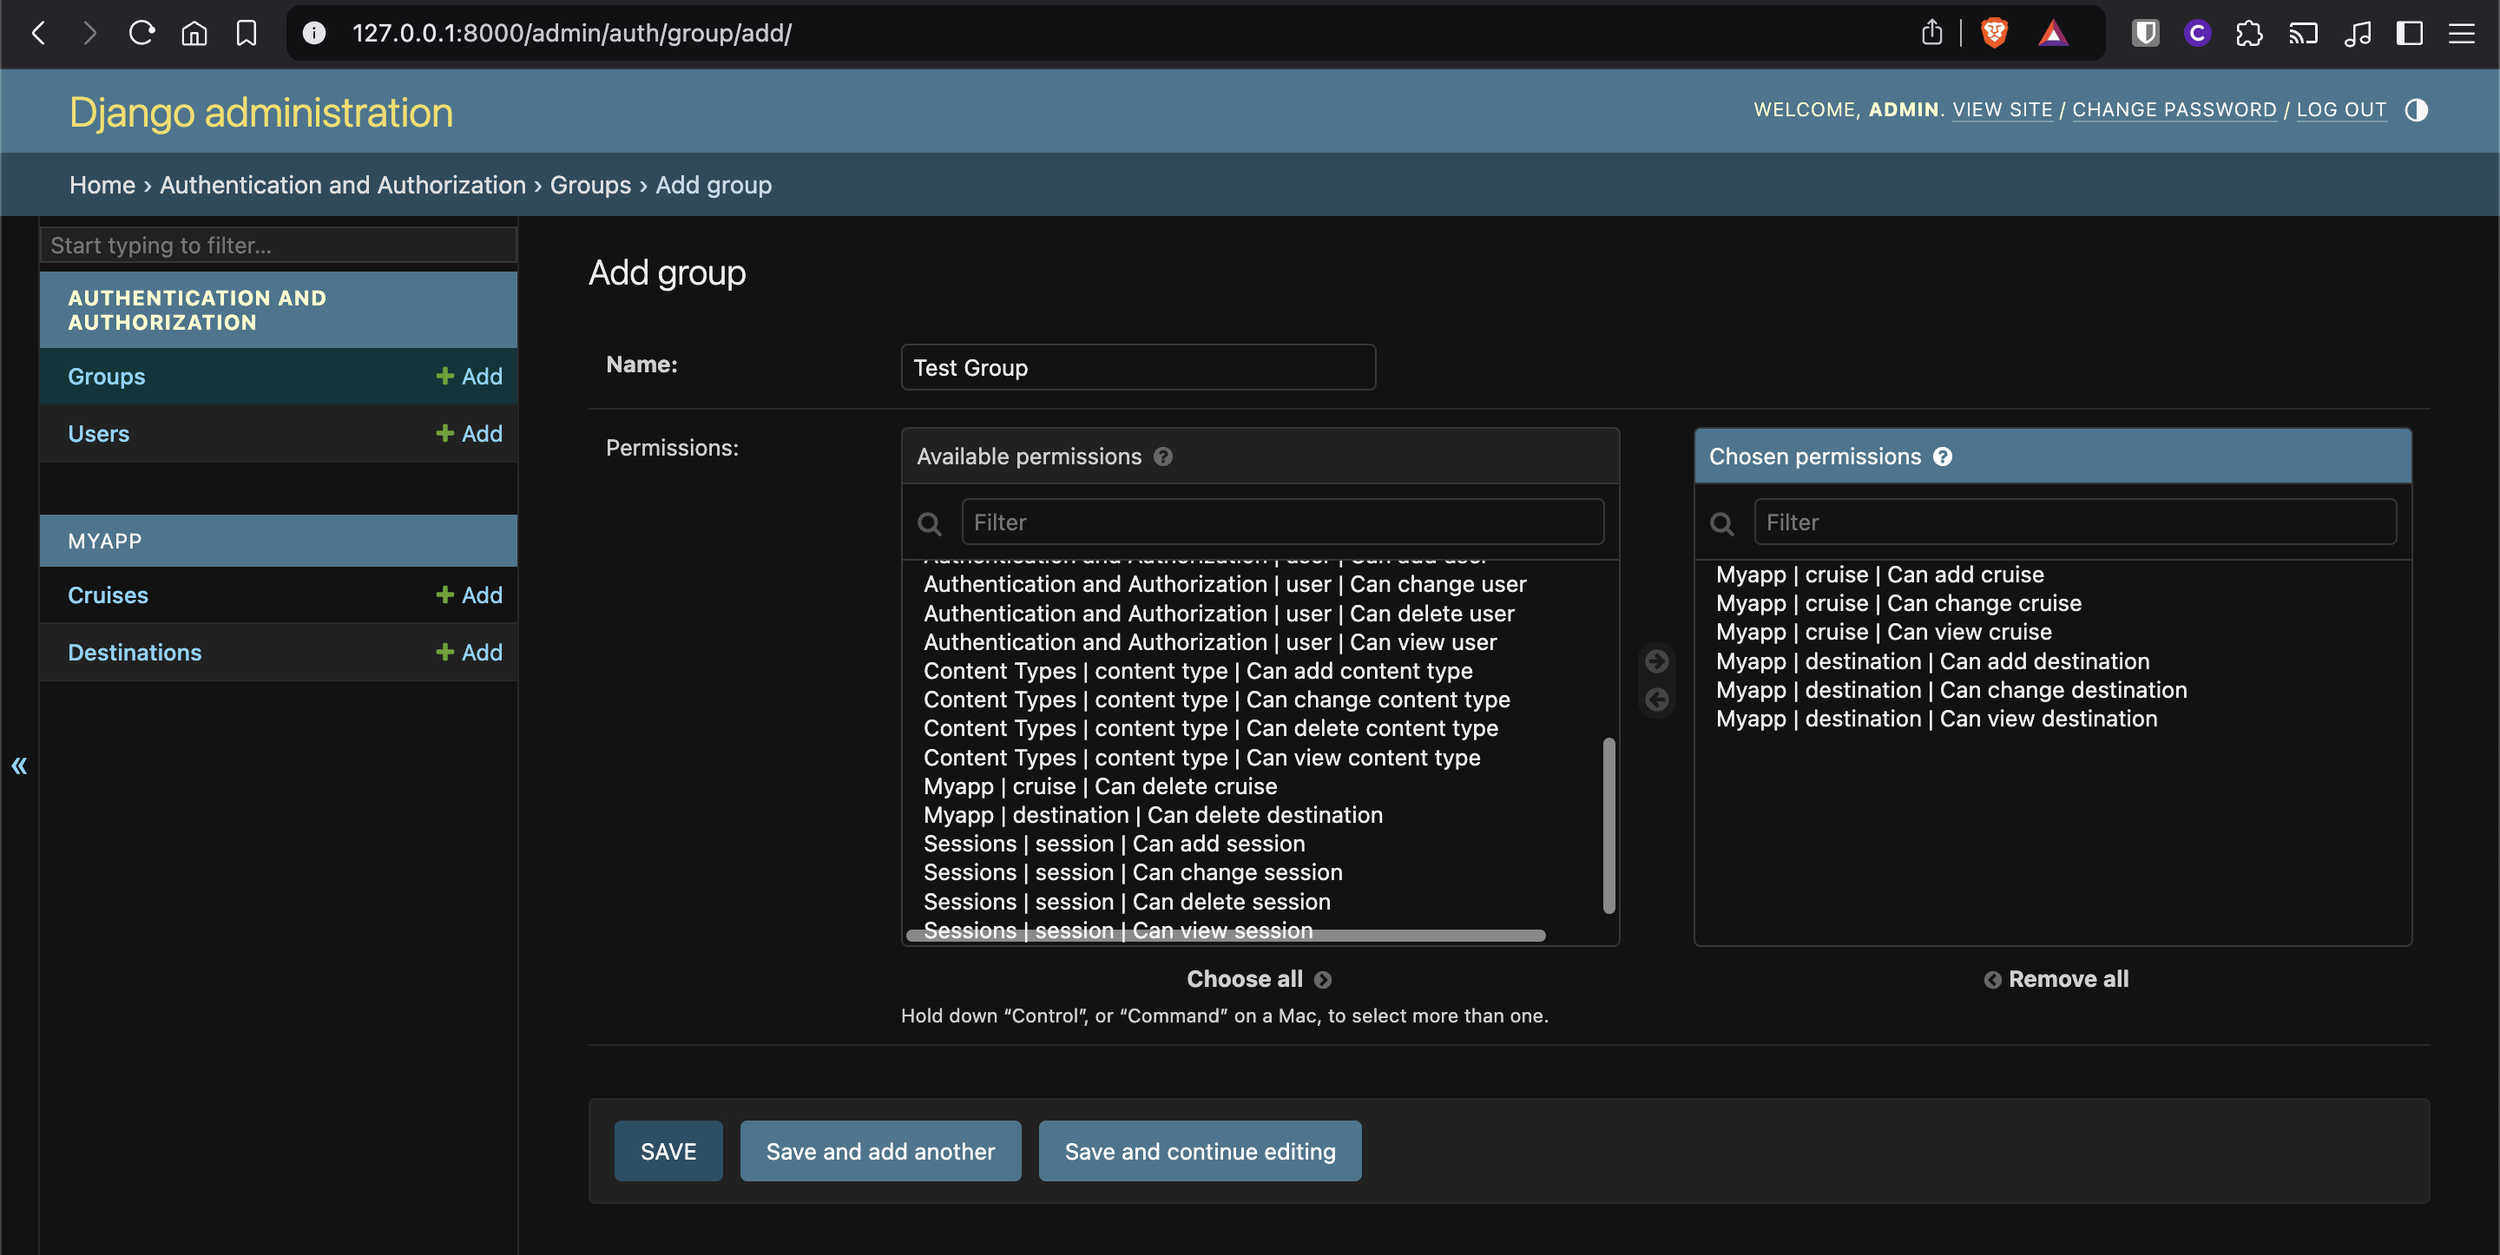
You can create groups which makes managing permissions for a group of users much easier. Go to the Admin page (logged in as the super user) and click Groups then click Add Group. Give the new group a name (eg. Test Group) and then set the permissions for users in the group (eg. can add cruise, can add destination, etc). Save the group.
Assign users to groups
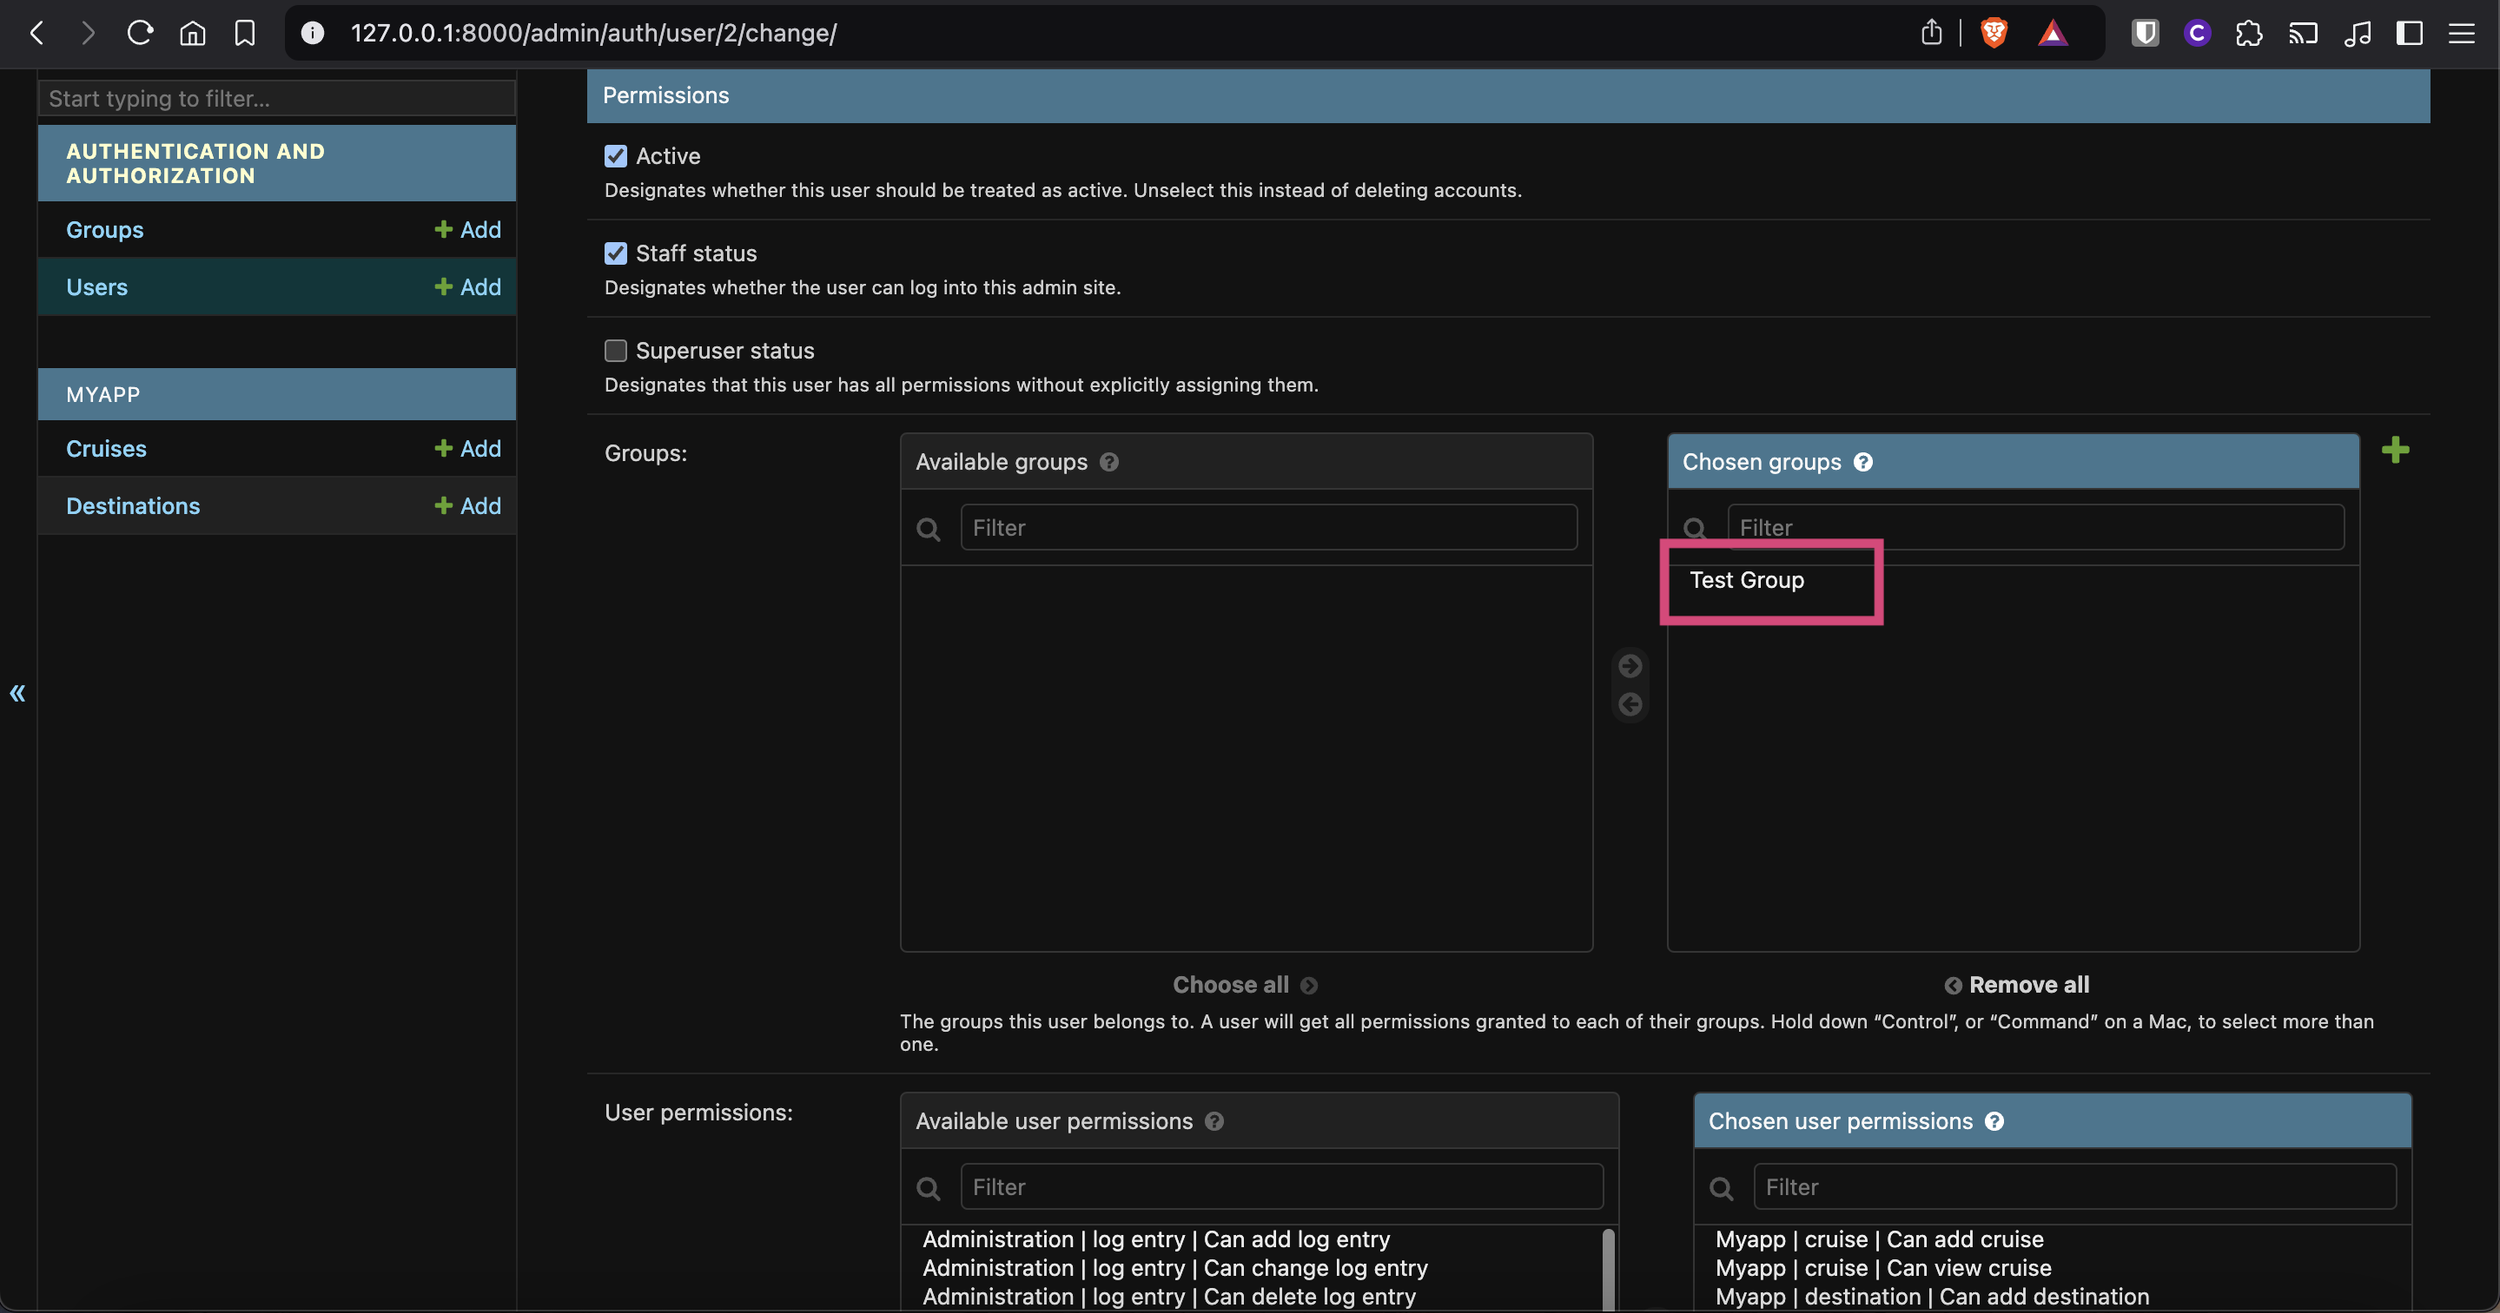
Go back to the Users screen, select a user (eg. staff1). Scroll down to Groups and you will see that you can assign the user to the group you created (using the same method you used before to assign permissions to a user). Click Save. The user will now have permissions that the assigned group (eg. Test Group) has as well as any additional specific permissions given to that user.
As you can see, the Django Admin makes it very easy to create user accounts for the back-end of your application with different permissions/access levels and to view, add, edit and delete data in your database.
Next lesson: Creating views in Django


