Exploring SQLite databases with Django
Building web applications with Python & Django
🕑 This lesson will take about 20 minutes
In the previous lesson, we created a model for our database (for storing information about travel destinations) and used the migrate command to apply migrations to our database. Migrations are Django's way of applying changes made to your models (e.g., adding fields, changing field types, or creating new tables) into your database schema. After running the migrate command, a new file called db.sqlite3 was created which contains the database.
Currently, if you attempt to open the db.sqlite3 file in VS Code, you will receive a message like “The file is not displayed in the text editor because it is either binary or uses an unsupported text encoding.” If you attempt to open the file anyway, the contents will be a mess that is difficult to interpret.
This is where the third-party SQLite extension for VS Code (by alexcvzz) can help. This extension allows us to browse the database more easily. If you haven’t already, install the SQLite extension by opening the Extensions panel in VS Code, search for “SQLite” and select the SQLite extension by alexcvzz, then click Install.
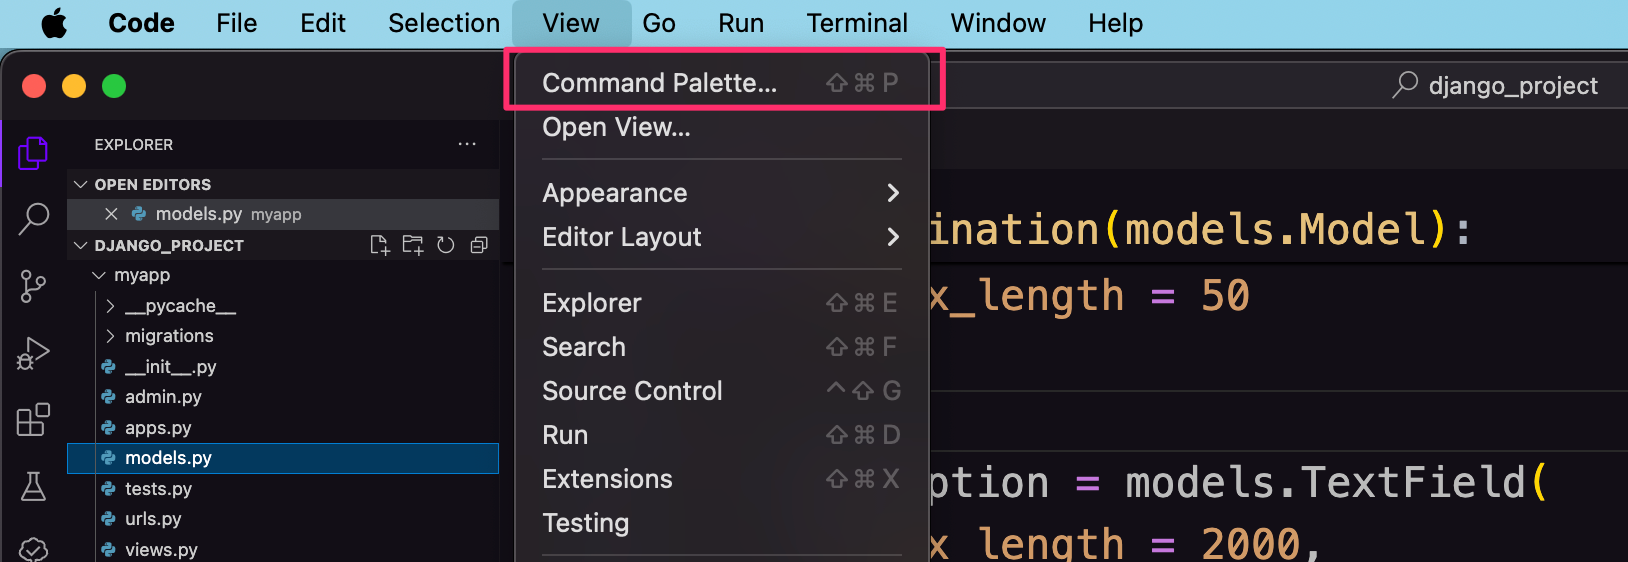
After installing the SQLite extension, open the Command Palette (from the View menu).
You should be able to find a list of SQLite commands. If not, start searching the list of commands for “SQLite” and select the SQLite: Open Database command.
You will now need to select the database you wish to open. Select the db.sqlite3 file from the menu in the command palette.
Now you will be able to select tables in your database and browse their contents. Open the SQLITE EXPLORER from the Explorer panel (shown on the left in the screenshot below). There will be some other tables there already that are used for configuration that you won’t need to work with. Select the table that you created for your app in the previous lesson (its name will contain the name of your app and the name of the model you created eg. myapp_destination).
In the screenshot below, the myapp_destination table is selected and we can see that there are three columns in the table:
id (integer) - we didn’t create this field but Django automatically created it so that each record in the table has a unique ID. This field is known as a primary key - a unique ID generated for each record that automatically increments.
name (varchar50) - a field that contains character strings of varying length (up to a maximum of 50 characters in this case)
description (text) - a field that contains longer text
Selecting the arrow icon next to a table name in the SQLITE EXPLORER panel will display the contents of the table. Currently, our table is empty so there won’t be any records to display.
Adding more fields to a table
If you want to add or modify fields in a database table using Django, you simply need to modify the model in the models.py file and then apply the migrations so that changes are reflected in the database.
We will add some more fields to the Destination table in the database. Open the models.py file and add a new field to the Destination class we created in the previous lesson (under the Name and Description fields):
slug = models.SlugField()
Save your code. If you now try to run the python3 manage.py makemigrations command in the VS Code Terminal, you’ll get a warning message and need to make a choice:
It is impossible to add a non-nullable field 'slug' to destination without specifying a default. This is because the database needs something to populate existing rows.
Please select a fix:
1) Provide a one-off default now (will be set on all existing rows with a null value for this column)
2) Quit and manually define a default value in models.py.
Select an option:
This message appears because we have introduced a new field called slug to the database but Django doesn’t know what we want to do with any existing records in the database that don’t have the slug field. Type in 1 to select Option 1 (provide a one-off default) and press the Return/Enter key. You will now receive the following message:
Please enter the default value as valid Python.
The datetime and django.utils.timezone modules are available, so it is possible to provide e.g. timezone.now as a value.
Type 'exit' to exit this prompt
Type in 'none' (including the single quotes) and press the Return/Enter key to set this value as the default for existing records.
Now run the command python3 manage.py migrate
The screenshot below shows the commands we have just entered and the responses in the terminal.
Go to the SQLITE EXPLORER panel again and click the Refresh icon to refresh the view. You should now see the new field slug (varchar50)) listed under your Destination table in the explorer.
Next lesson: Creating relationships in an SQLite database


